A data source defines which Salesforce data will be available for export to Power BI.
In Metrica Power BI Connector for Salesforce, you create a data source by selecting Salesforce objects and fields, applying filters, and validating the structure before saving it.
This page explains how to configure general settings, choose objects and fields, limit data with filters, switch between Basic and SOQL modes, preview the dataset and ERD, and save the data source for Power BI reporting.
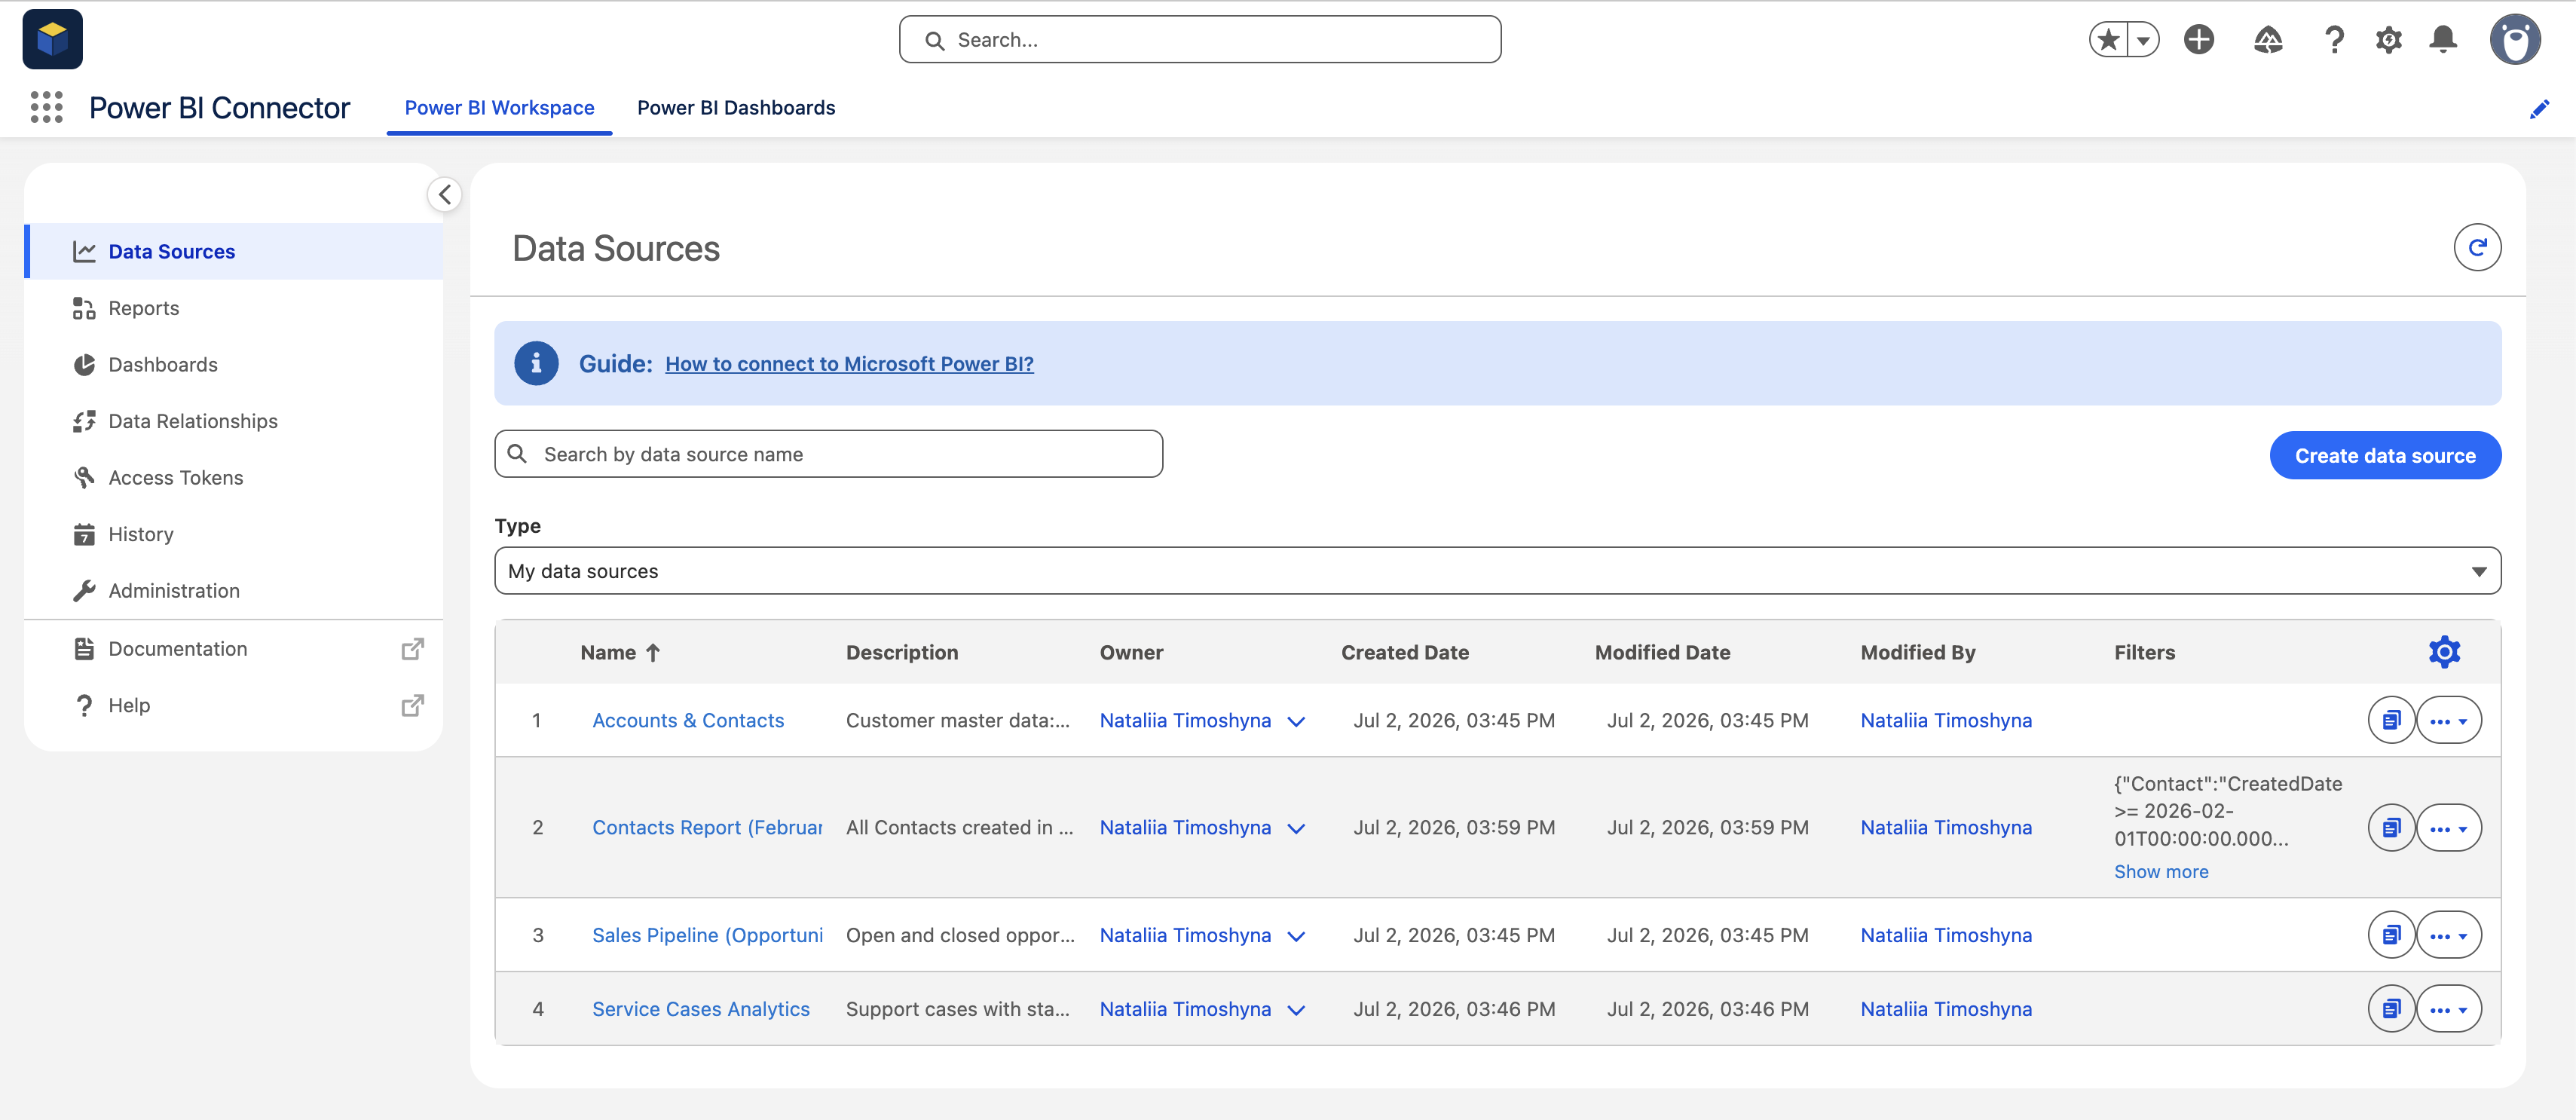
1. Open Data Sources #
Go to Power BI Connector → Data Sources and click Create data source.
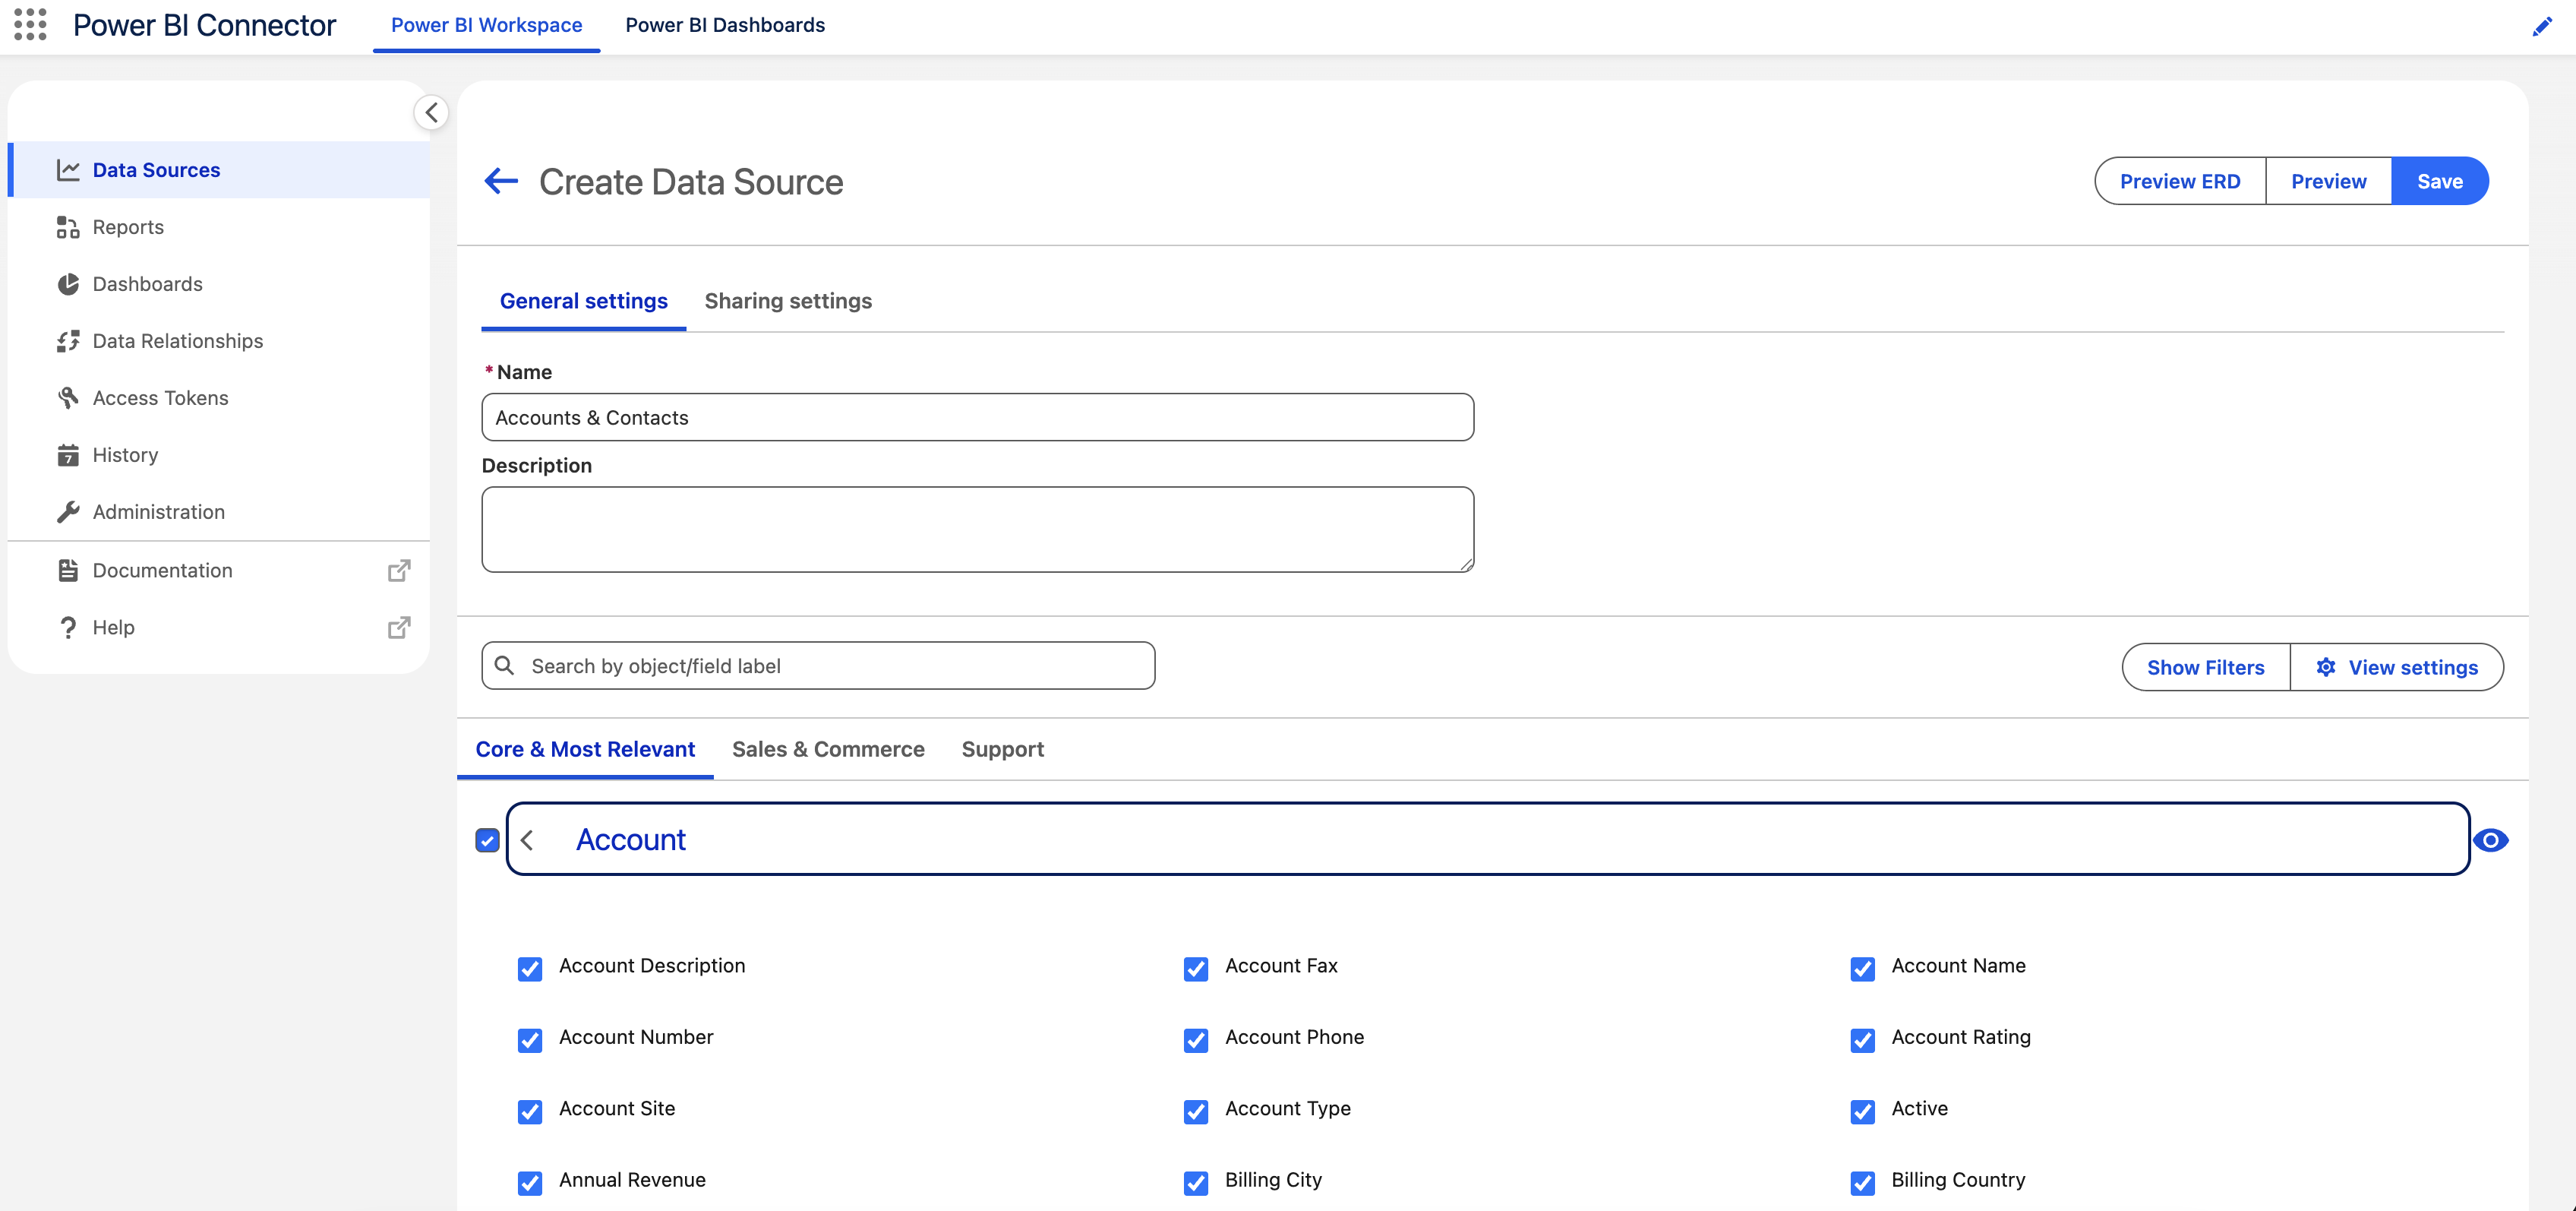
2. Configure General Settings #
Fill in the basic information:
- Name – a clear name for your dataset
- Description – optional, helps explain the use case
Example:
- Name: Contacts Report (February)
- Description: All Contacts created in February 2026

3. Select Objects and Fields #
Choose Salesforce objects and the fields you want to include.
- Expand objects like Account, Case, Contact
- Select only the fields you need
- Relationships between objects are preserved automatically
4. Apply Filters #
Use filters to limit the dataset:
- Filter by Created Date, Updated Date, Owner, etc.
- Example: CreatedDate >= 2026-02-01 AND CreatedDate <= 2026-02-28
This helps reduce data volume and improves performance.

5. Use View Settings (Optional) #
Click View settings to control how data is displayed:
- Expand or collapse all objects
- Sort tables (default / selected first)
- Show API names and field types

6. Switch Between Basic and SOQL #
You can configure your query in two ways:
- Basic mode – visual filters and selections
- SOQL mode – advanced query editing for full control
SOQL is useful for precise filtering and custom logic.

7. Preview Data Source #
Before saving, you can validate your setup:
Preview Data #
Shows:
- Selected objects
- Applied filters
- Exported fields

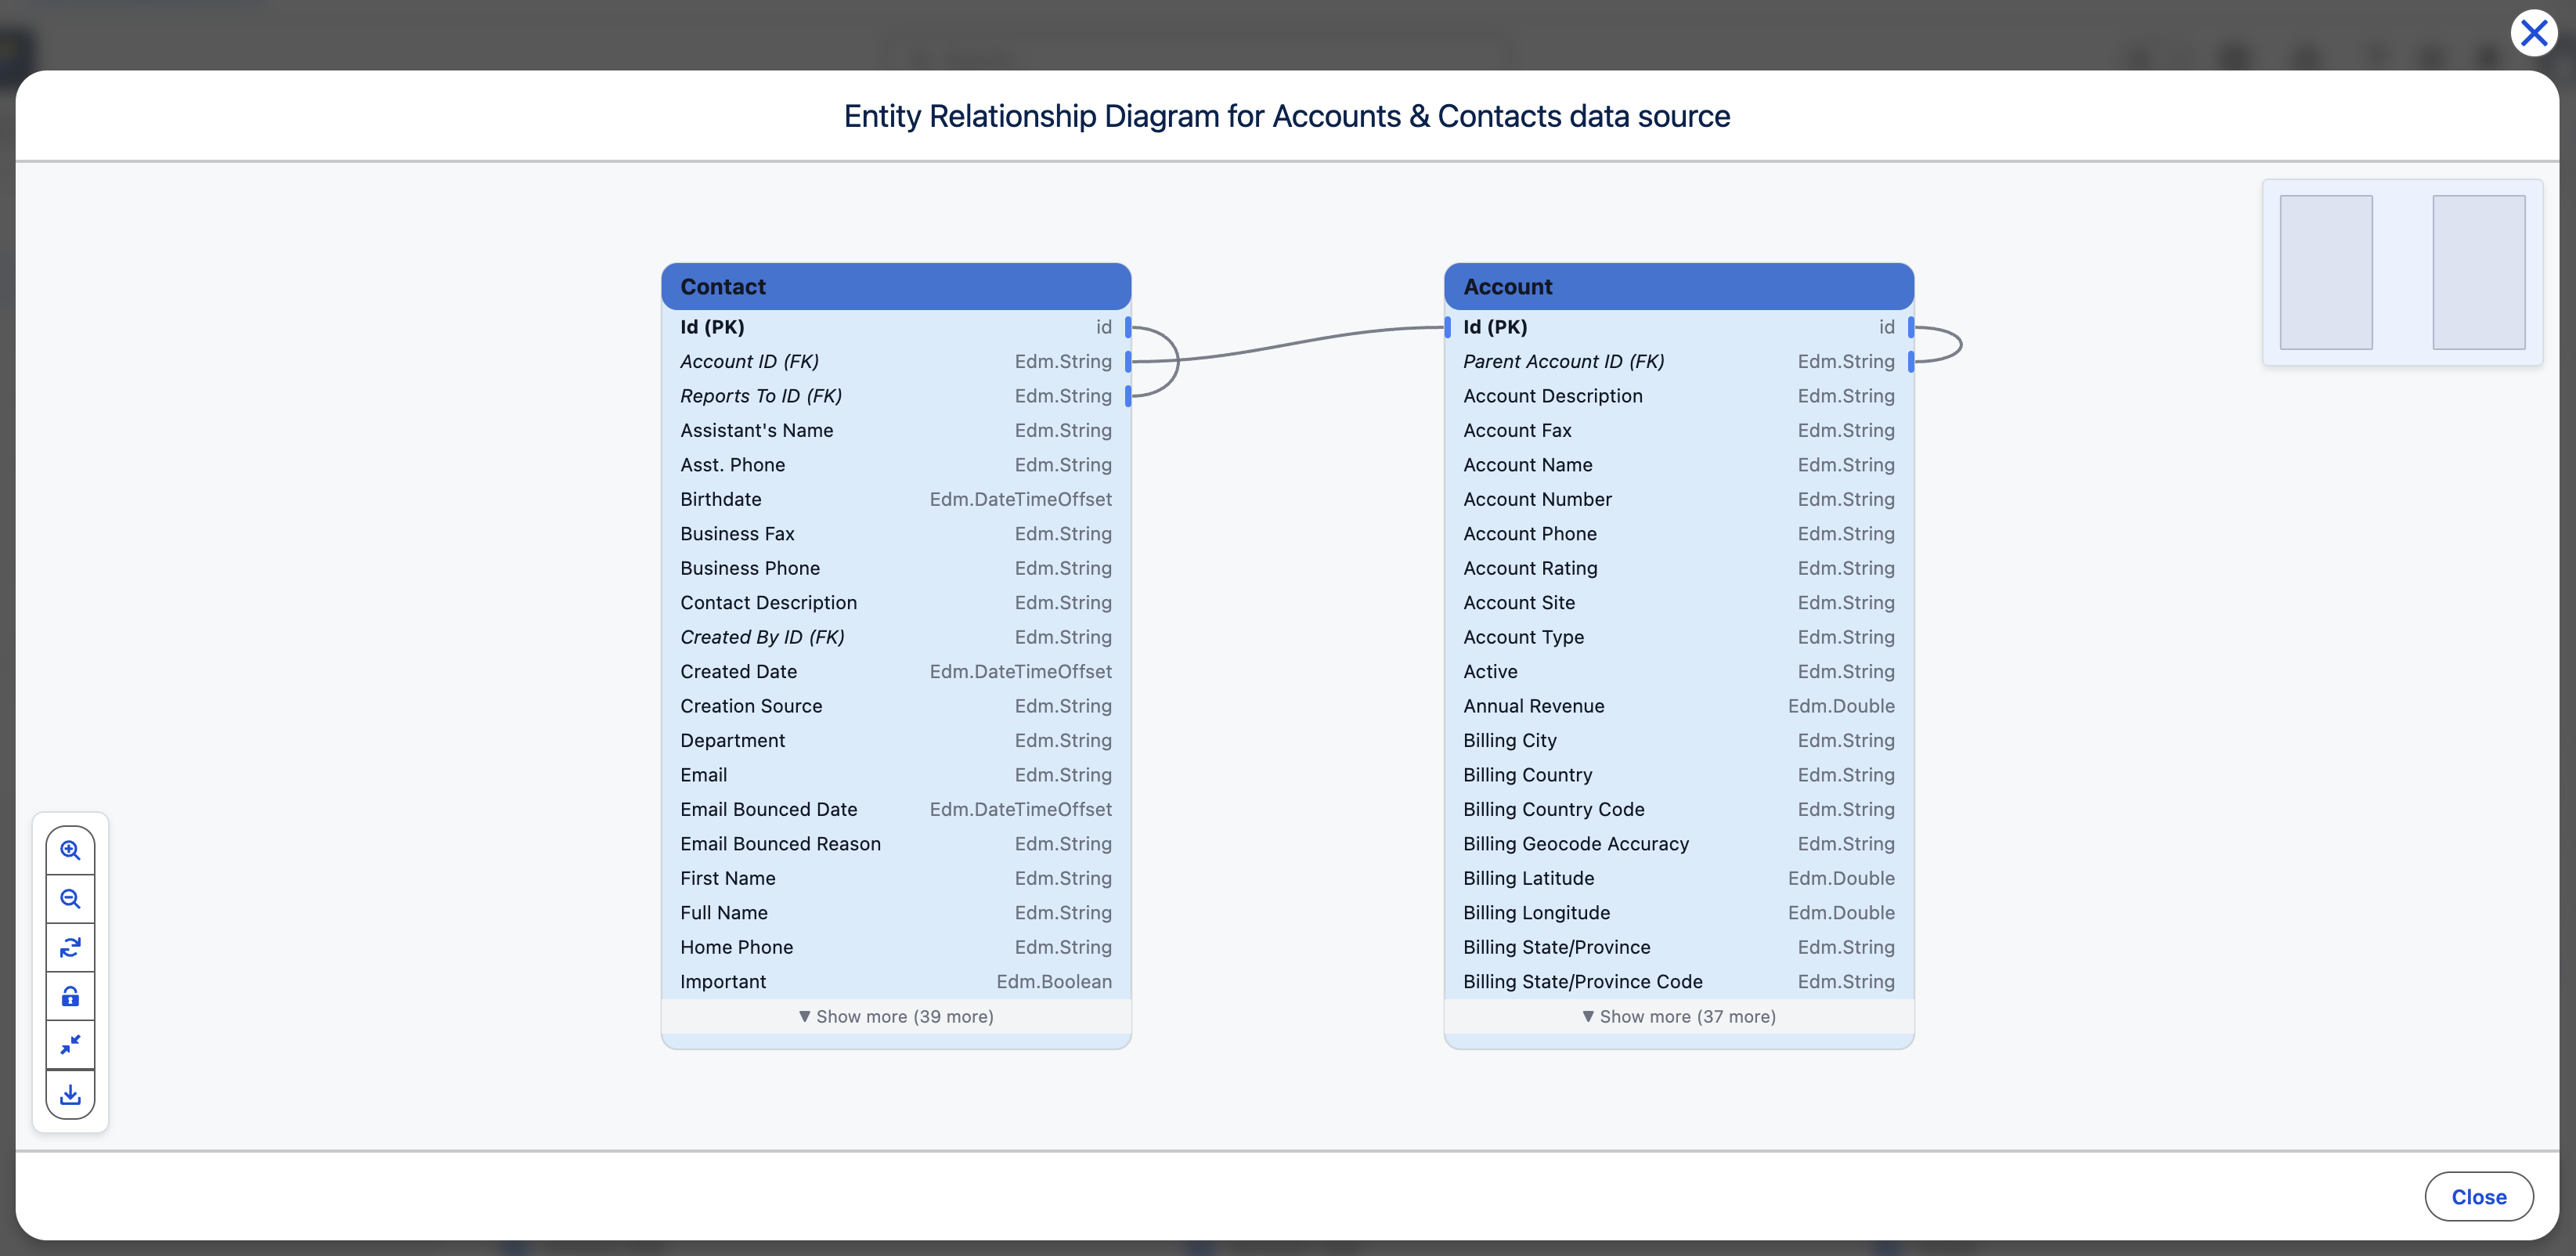
Preview ERD (Entity Relationship Diagram) #
Visualizes:
- Objects (tables)
- Relationships between them
- Field structure
8. Save the Data Source #
Click Save to finalize.
Your data source is now ready to be used in Power BI with reliable, structured access to Salesforce data .
💡 Tips #
- Start with a small dataset (e.g., one object + filters)
- Use descriptive names for easier navigation
- Always check Preview before saving
- Use SOQL only when you need advanced logic


