This guide explains how to import Salesforce data into Microsoft Power BI using Metrica Power BI Connector for Salesforce.
Follow the steps below carefully to complete the setup.
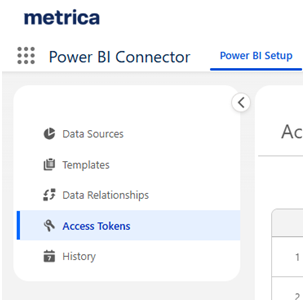
1. Create an Access Token #
Before connecting Power BI, you need to generate an access token.
Step 1: Open the Connector App #
- Open the Power BI Connector application.
- Go to the Access Tokens menu.
Step 2: Create a New Token #
- Click the Create Token button.
- Enter any label (name) for your token.
- (Recommended) Set an expiry date.
- Click Create.

You can view and copy the token only once. Make sure you copy it immediately and store it securely.
Do not share this token with anyone.
You can revoke any token at any time from the Access Tokens menu. Expired tokens automatically stop working, so it is safe to revoke them when needed.
2. Create a Data Source in Power BI Connector #
Before moving to Power BI Desktop, you need to create a Data Source inside the Power BI Connector application.
This is where you define:
- The report name
- Which Salesforce objects (tables) to export
- Which fields to include
Step 1: Open Data Sources #
- Open the Power BI Connector application.
- Go to the Data Sources section.
- Click Create data source.

Step 2: Enter General Information #
On the Create Data Source screen:
- Enter a Name for your report
(Example: Contacts Report) - Optionally add a Description

Step 3: Select Objects and Fields #
- Find the Salesforce object you want to export (e.g., Account, Contact, Case).
- Check the object.
- Expand it to see available fields.
- Select the fields you want included in your export.
You can:
- Use the search bar to find specific fields
- Switch between Basic and SOQL modes if needed
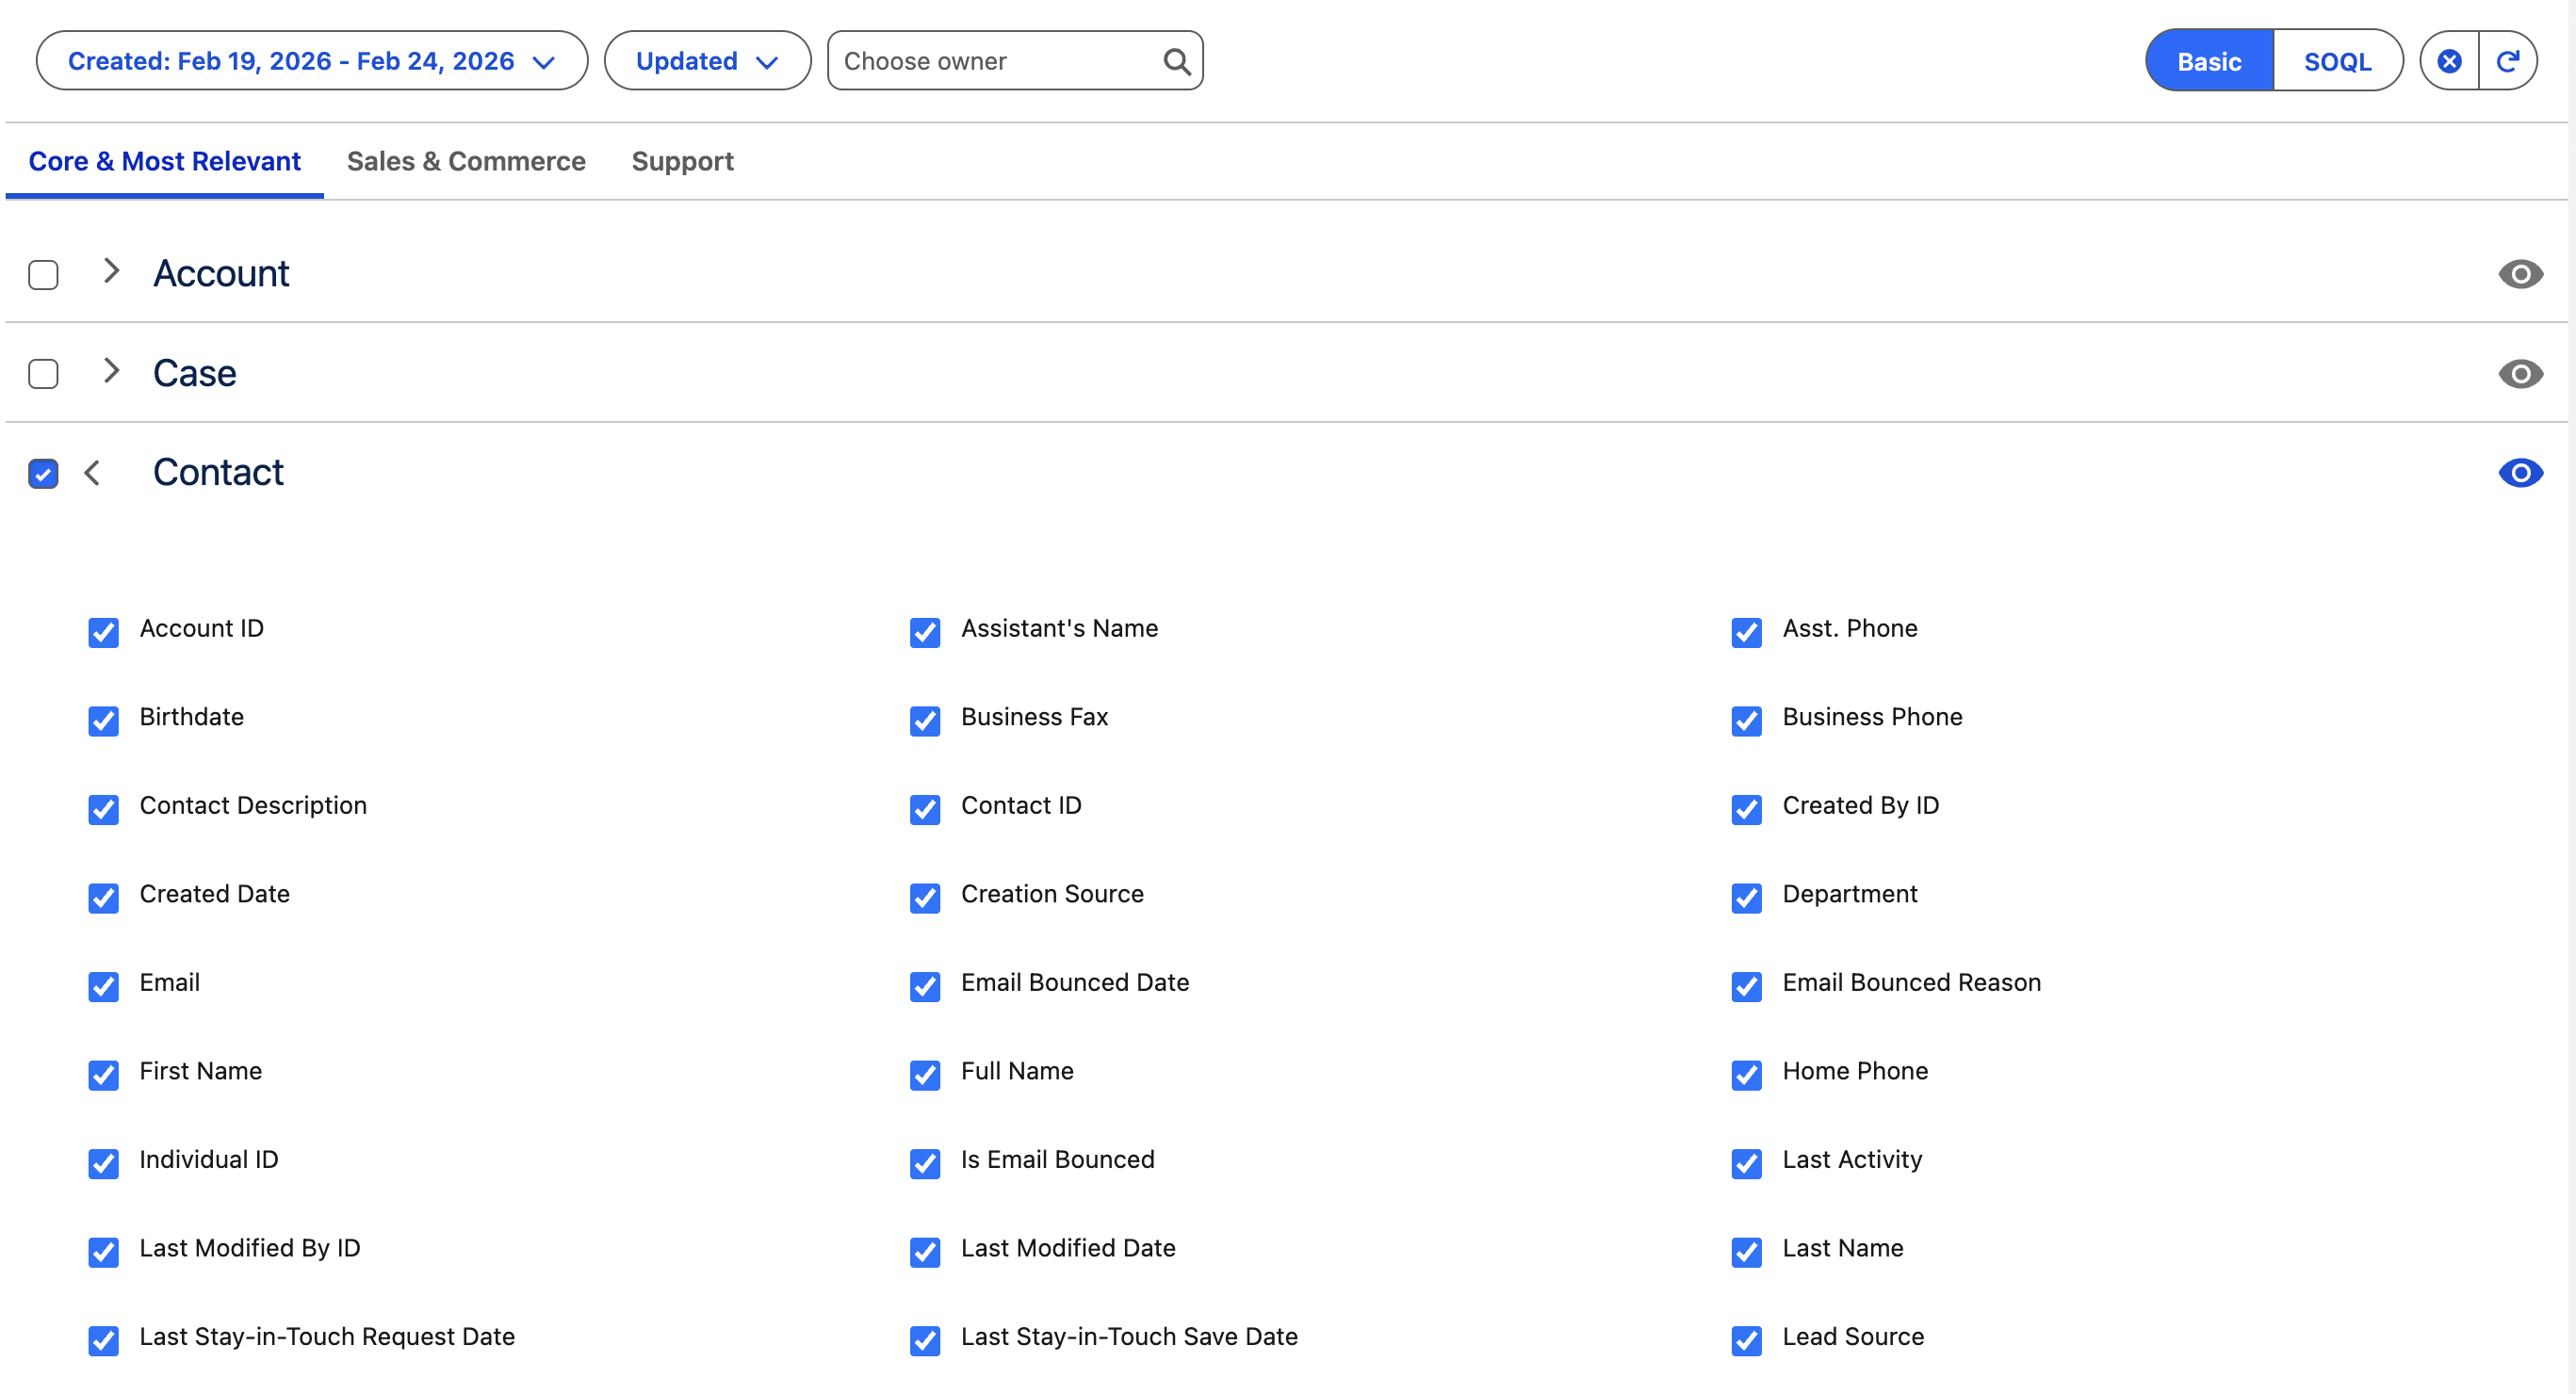
Repeat this for all objects and fields you want included in the report.
Step 4: Save the Data Source #
- Click Save (top right corner).
- After saving, return to the Data Sources list.
Step 5: Copy the Power Query Script #
In the Data Sources list:
- Find your newly created data source.
- Click the copy icon (Power Query icon) next to it.
- This copies the Power Query script to your clipboard.

The copied script will look similar to this:
let
    Source = OData.Feed(
        "[your Site URL]/services/apexrest/metrica_powerbi/OAuthProxy/a00XXXXXXXXXXXX",
        [xUserKey=metricaToken]
    ),
    Renamed = Table.RenameColumns(Source, {{"Data", "Value"}}),
    Selected = Table.SelectColumns(Renamed, {"Name", "Value"}),
    AsRecord = Record.FromTable(Selected)
in
    AsRecord
Where:
- [your Site URL] is the Salesforce Site URL you created earlier
(Example: https://your-instance.my.salesforce-sites.com) - metricaToken is the parameter you will create in Power BI Desktop
- The last part (a00XXXXXXXXXXXX) is your specific Data Source ID and will be different for each report
You will paste this script into Power BI Desktop in the next section.
3. Prepare Power BI (Desktop) #
Step 1: Create a Blank Report #
- Open Power BI Desktop.
- Create a new Blank Report.

- Go to Get Data → Blank Query.

Step 2: Create a Token Parameter #
Now you’ll store your access token inside Power BI.
- Click Manage Parameters → New Parameter

- Set:
- Name: metricaToken
- Current Value: Paste your active access token
- Click OK

4. Set Up Authorization & Choose Data Source #
Step 1: Copy the Data Source Script #
- Open Salesforce.
- Open the Power BI Connector application.
- Find the data source you want to download.
- Click the Copy button next to it.

Step 2: Paste the Script into Power BI #
- Go back to Power BI.
- In the Queries panel, right-click on Query1.
- Click Advanced Editor.

- Remove any existing script.
- Paste the script you copied.
- Click Done.

Step 3: Edit Credentials (If Required) #
If you see an Edit Credentials button:
- Click Edit Credentials

- Select Anonymous
- Click Connect

5. Prepare Tables for Your Report #
Now you’ll add the tables (Salesforce objects) you want to use.
Step 1: Add a Table as a New Query #
- Find the object you want to use.
- Right-click on the word Table next to the object name.
- Click Add as New Query.

Step 2: Rename the Table #
Make sure the new query has exactly the same name as the Salesforce object.

Step 3: Repeat for All Required Tables #
- Return to Query1.
- Repeat the previous steps for each table you want in your report.

Step 4: Clean Up Query1 #
Once all tables are added:
You can either:
- Delete Query1 (for a cleaner report), or
- Hide it (recommended if you may need it later)
Step 5: Apply Changes #
- Go to the Home tab.
- Click Close & Apply.
- Wait for Power BI to download the data.

After the data loads, you can hide Query1 if you haven’t already.

Setup Complete #
Your Power BI report is now connected and ready to use.
If you need to update your token in the future, simply edit the metricaToken parameter with a new active token.


