- Overview
- How Incremental Refresh Works
- Step 1: Open Power Query Editor
- Step 2: Create the RangeStart Parameter
- Step 3: Create the RangeEnd Parameter
- Step 4: Modify the Query for Incremental Refresh
- Step 5: Enable Incremental Refresh
- Step 6: Publish the Dataset
- Important Notes
- Troubleshooting Incremental Refresh
Overview #
Incremental refresh allows Power BI to update only the newest or modified data instead of reloading the entire dataset every time. This approach improves refresh performance and reduces the amount of data that must be processed.
For Salesforce reporting, this means Power BI does not need to re-import the full Salesforce dataset during every refresh.
Power BI Connector for Salesforce supports incremental refresh through Power BI’s built-in functionality.
Instead of importing all Salesforce records every time, Power BI updates only the most recent Salesforce data based on a defined time window. This helps keep reports up to date while making refreshes faster and more efficient, especially for large Salesforce datasets.
How Incremental Refresh Works #
Setting up incremental refresh involves several steps:
- Creating required parameters
- Updating the Power Query expression
- Configuring the incremental refresh policy
- Publishing the dataset to Power BI Service
- Scheduling refresh in Power BI Service
This guide focuses on the configuration steps inside Power BI Desktop.
If you have not yet imported Salesforce data into Power BI, refer to the data import guide before continuing.
Step 1: Open Power Query Editor #
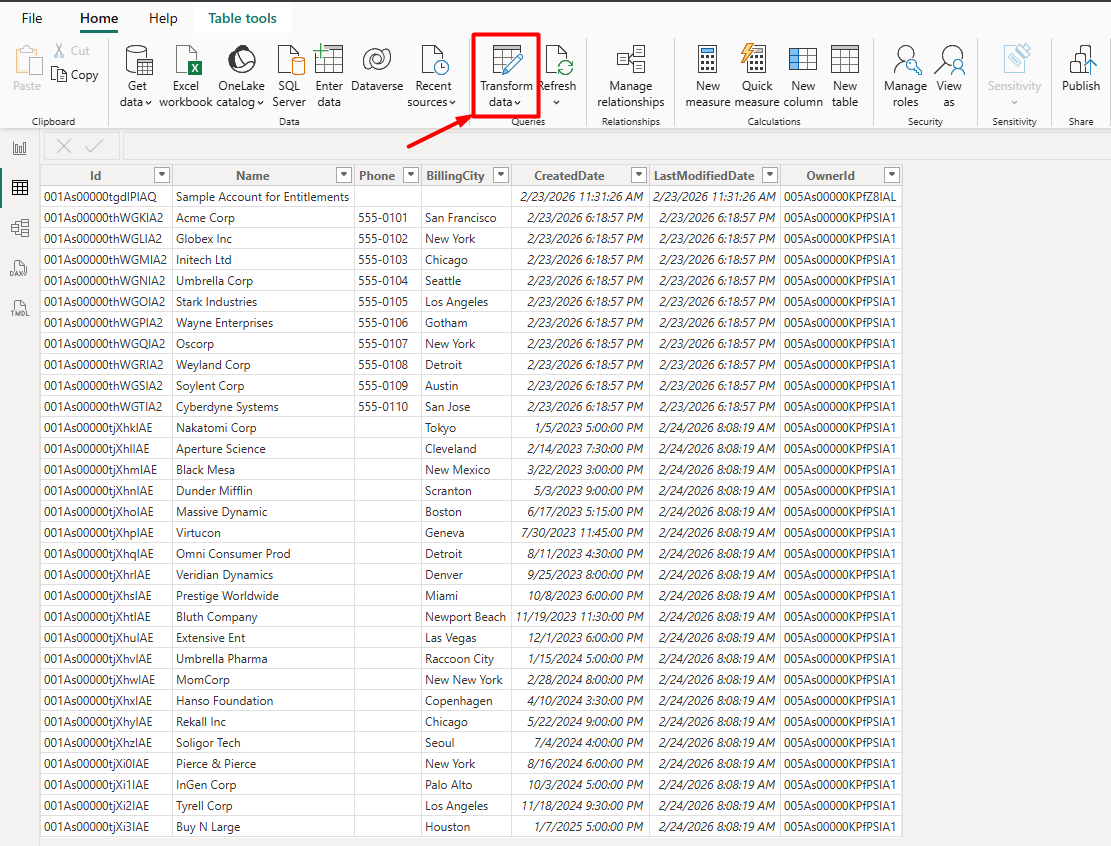
After connecting the connector to Power BI and selecting the Salesforce data you want to import, open the Power Query Editor.
- Click Transform Data in the Navigator window.
If the dataset has already been loaded, you can open the Power Query Editor from the Transform Data option on the Power BI ribbon.
Step 2: Create the RangeStart Parameter #
Incremental refresh requires two parameters:
RangeStartRangeEnd
Both parameters must:
- Be Date/Time type
- Use the exact names
- Be case-sensitive
To create the first parameter:
- In Power Query Editor, select Manage Parameters.
- Click New Parameter.

Configure the parameter:
- Name:
RangeStart - Type:
Date/Time - Current Value: choose any start date and time

Then click New.
When configuring incremental refresh in Power BI Desktop, these parameters are used to filter only a small portion of the dataset locally. When the dataset is published to Power BI Service, the service automatically replaces these values to generate partitions for historical and incremental data.
Step 3: Create the RangeEnd Parameter #
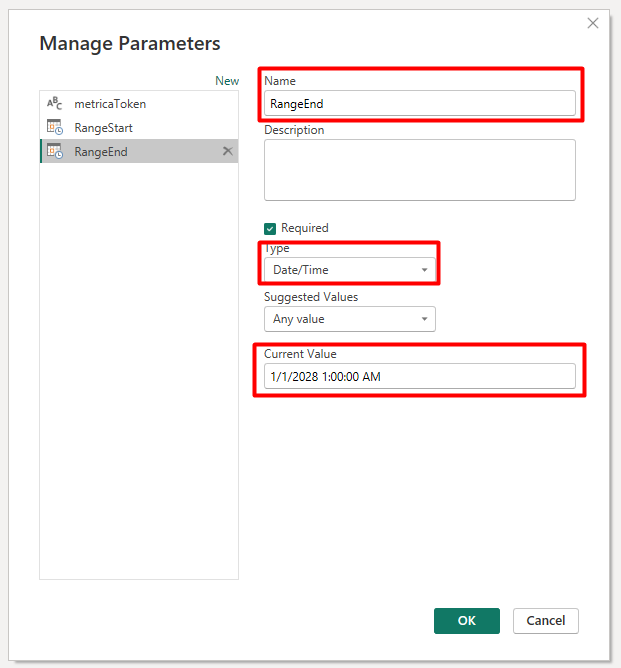
Now create the second parameter.
- In the Name field enter:
RangeEnd
- Set the Type to:
Date/Time
- Set a Current Value representing an end date/time.
Click OK to save the parameter.
As with the previous parameter, Power BI Service will later override these values when building dataset partitions.
Step 4: Modify the Query for Incremental Refresh #
Next, the query must be updated to use the parameters.
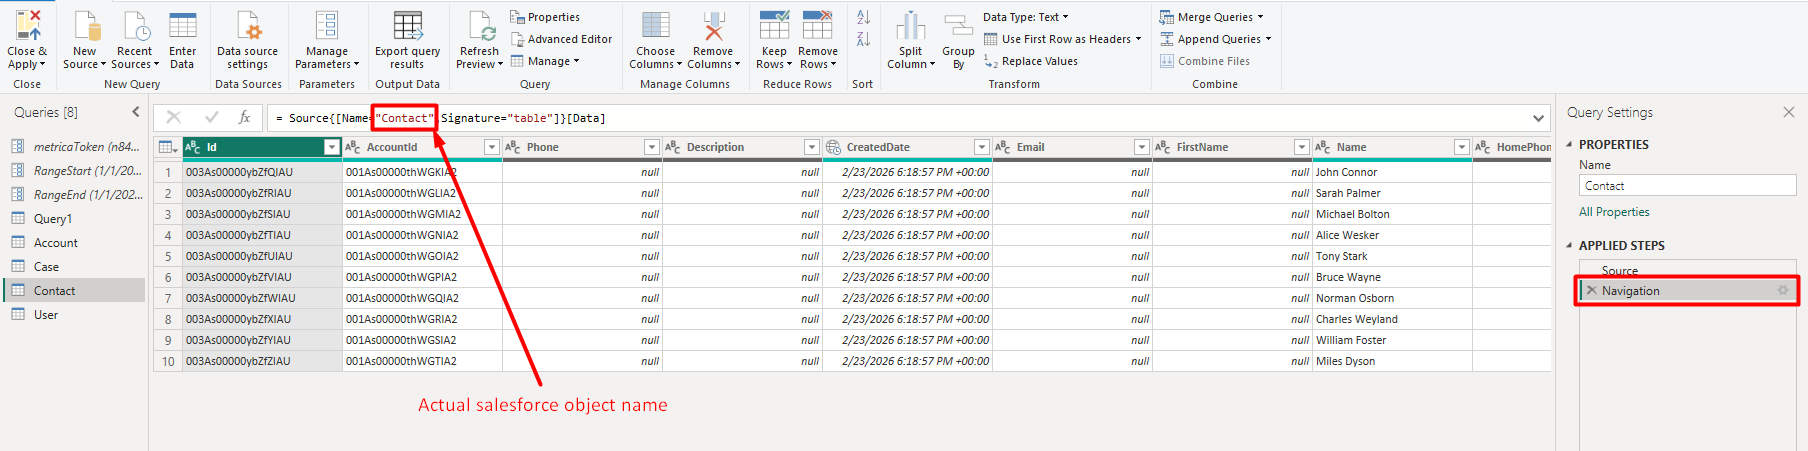
- Select the Navigation step in the query.
- Open the query editor.
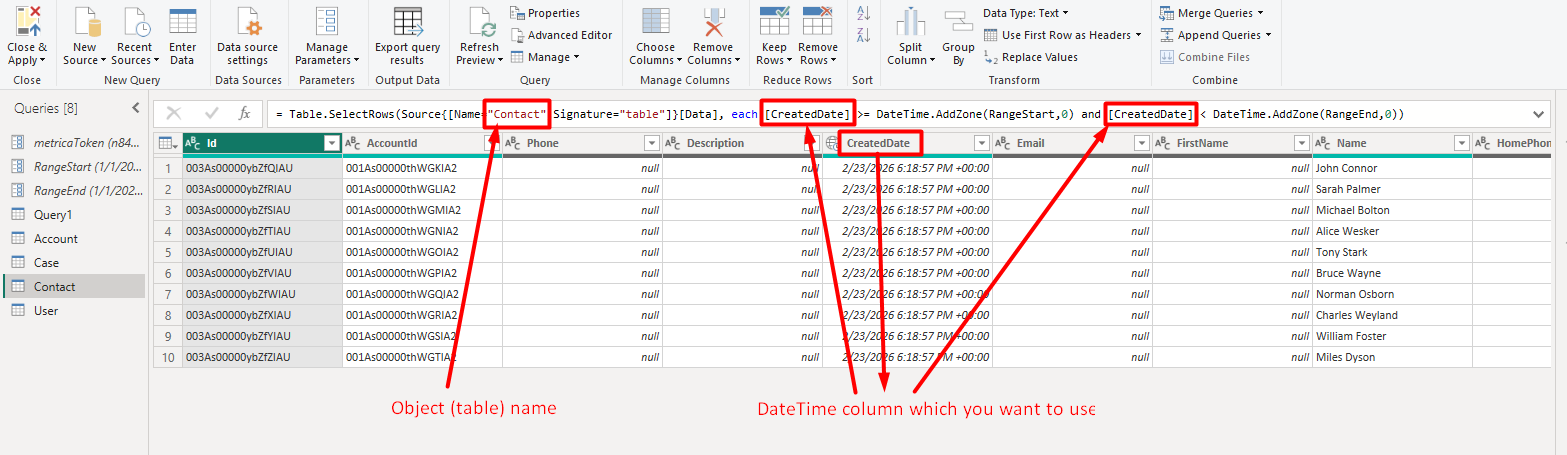
- Replace the existing query with the following expression.
= Table.SelectRows(
    Source{[Name="Contact",Signature="table"]}[Data],
    each [CreatedDate] >= DateTime.AddZone(RangeStart,0)
    and [CreatedDate] < DateTime.AddZone(RangeEnd,0)
)
Example variables used in this query:
- Contact — Salesforce object name
- CreatedDate — DateTime field used for filtering data
Adjust these values if you are working with a different Salesforce object or date field.
After updating the query:
- Select Close & Apply.

Power BI may take a few moments to apply the changes.
At this point, the query should contain two applied steps:
- Source
- Navigation
Step 5: Enable Incremental Refresh #
Now configure the incremental refresh policy.
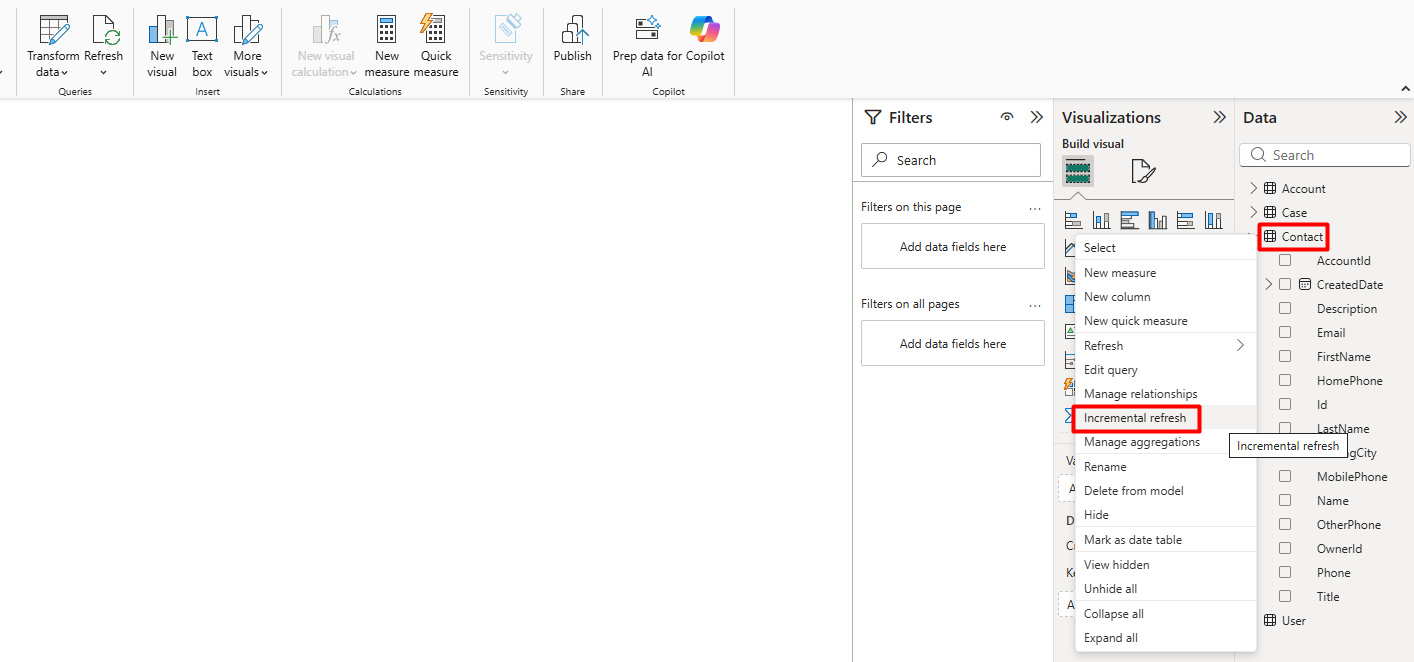
- In the Fields panel, right-click the table you want to configure.
- Select Incremental refresh.
In the Set import and refresh ranges section:
- Turn the Incrementally refresh this table slider On.
- Configure the archive and refresh periods according to your requirements.
- Click Apply.
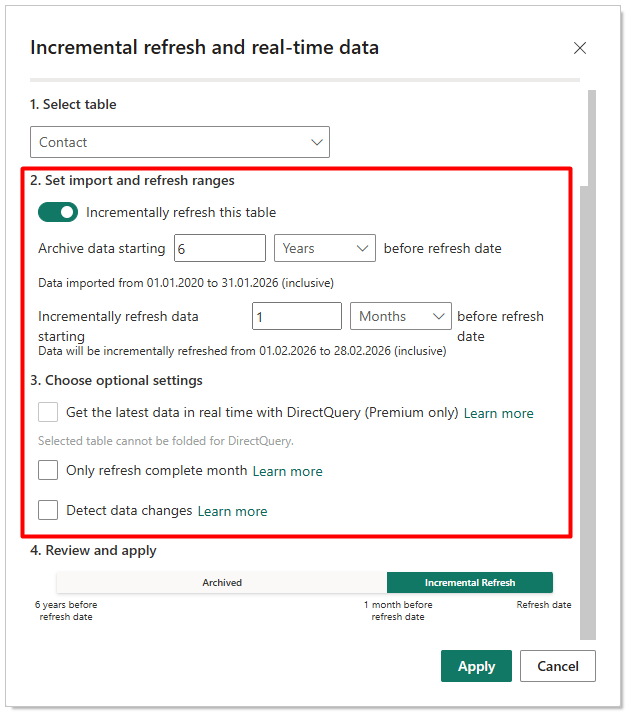
Optional settings #
- Refresh only complete days
Ensures the refresh window only includes fully completed days. - Detect data changes
This option is generally not recommended because it can increase server load and slow down refresh performance.
If the incremental refresh slider is disabled, it usually means:
- The query does not reference
RangeStartandRangeEnd - Parameter names are incorrect
- Parameter data types are not set to Date/Time
Step 6: Publish the Dataset #
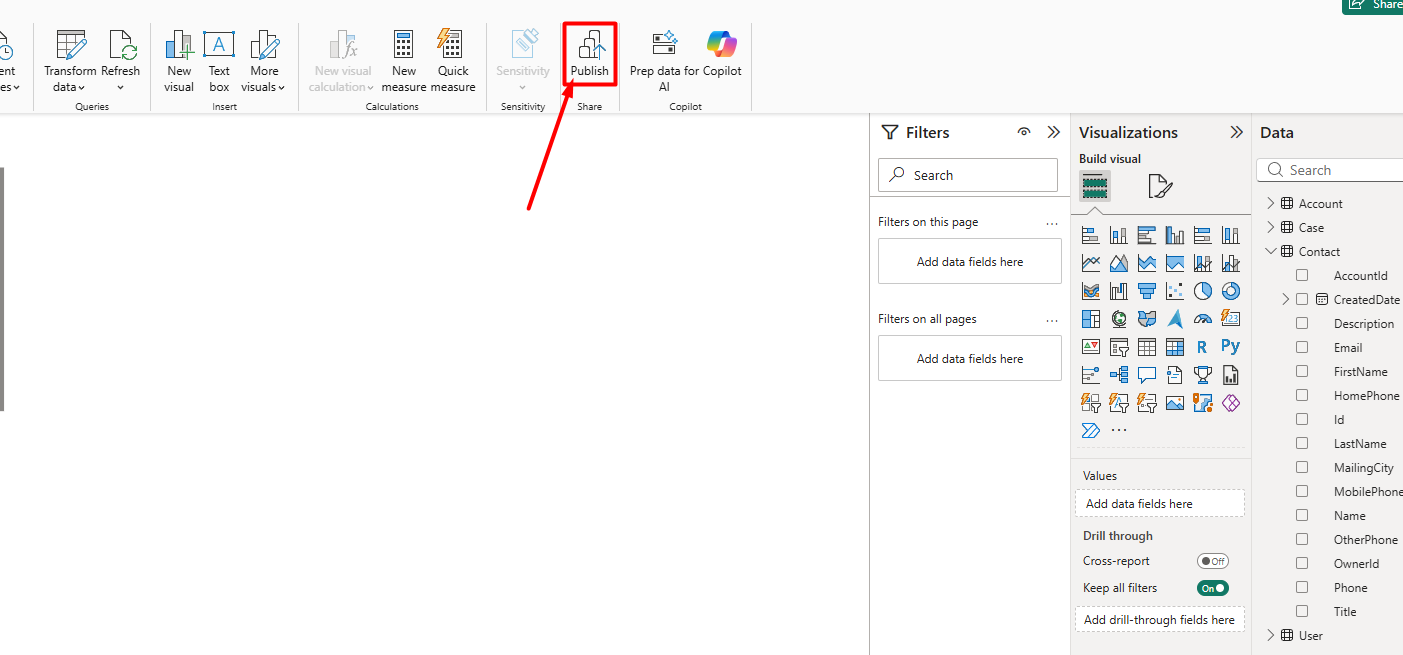
After configuring incremental refresh:
- Click Publish in Power BI Desktop.
Once published:
- The dataset appears in your Power BI Service workspace
- The first refresh loads both historical and incremental data
- Future refreshes process only incremental changes
Important Notes #
Incremental refresh divides the dataset into two logical sections:
Incremental section
- Updated during each refresh
- Contains the most recent data
Archive section
- Loaded during the initial refresh
- Remains unchanged in subsequent refreshes
Because the refresh windows are relative to the current date, they automatically move forward over time.
Troubleshooting Incremental Refresh #
If incremental refresh fails during dataset refresh in Power BI Service, the issue may be related to dataset partitioning or duplicate values in the date column used for filtering.
To troubleshoot common refresh errors and duplicate value issues, refer to the Microsoft documentation. This guide explains common causes of refresh failures and how to resolve them in Power BI.


