Table of Contents
An access token is the password Power BI uses to read your data sources. Creating one takes a minute, and you can revoke it at any time without touching your HubSpot account or your other tokens.
Each token is linked to your HubSpot user. Power BI signs in with the email address of your HubSpot account as the user name and the token as the password. Any HubSpot user who can open the connector can create tokens; you do not need administrator rights.
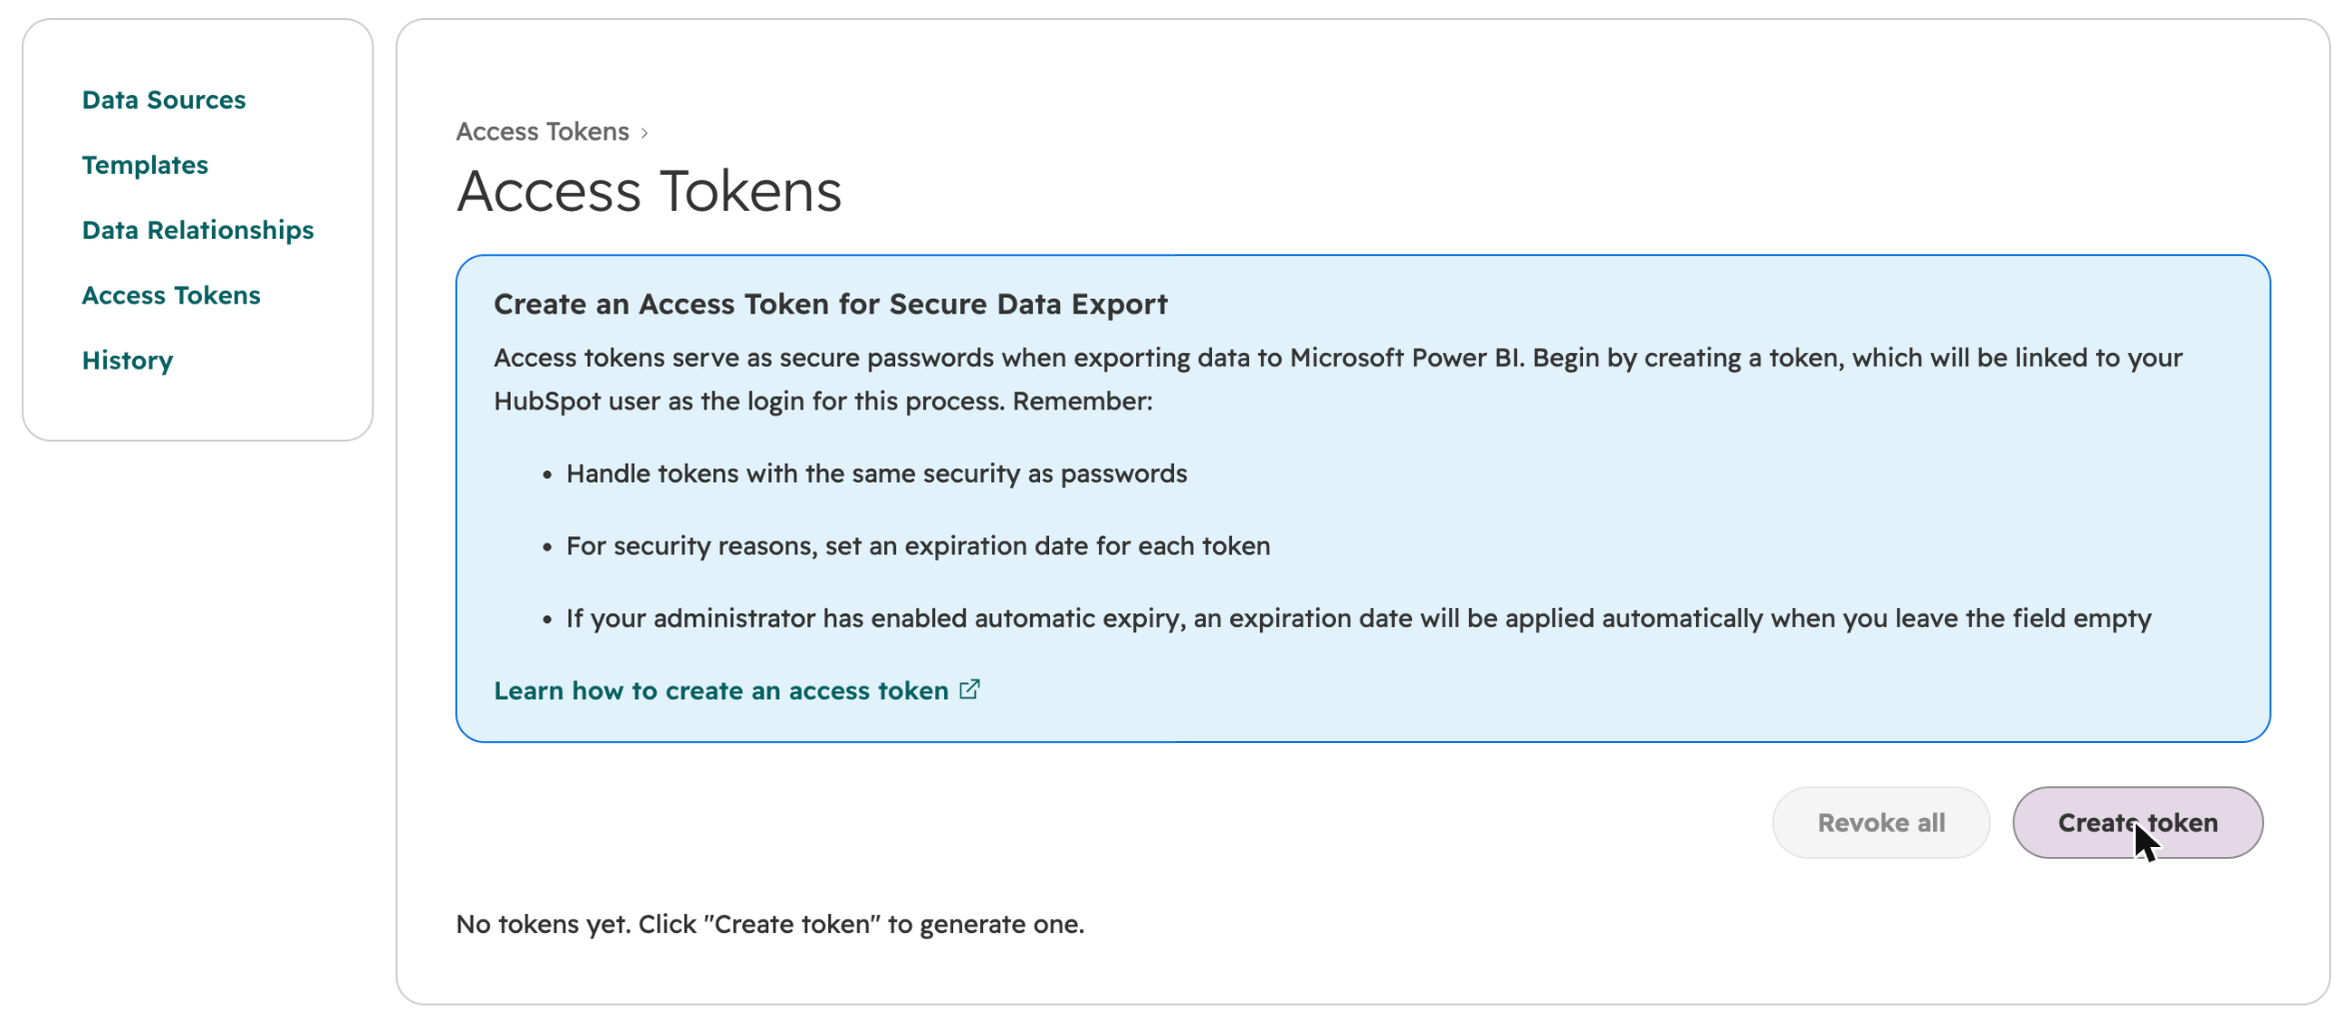
Step 1: Open Access Tokens #
- Open the connector in HubSpot.
- In the connector’s menu, select Access Tokens. The page lists every token you have created.
- Select Create token.
Step 2: Name the token #
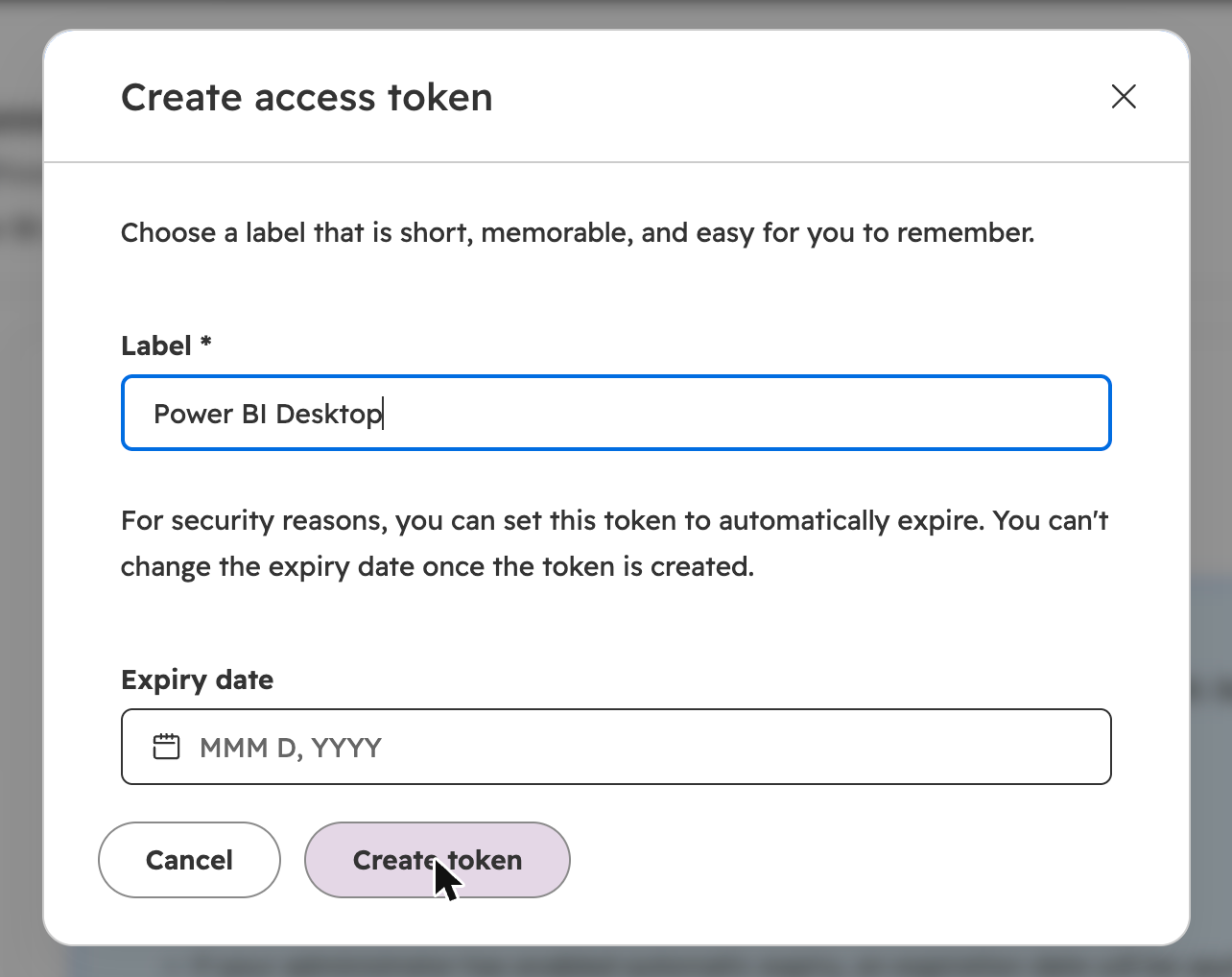
- Enter a Label that tells you where the token is used, for example Power BI Desktop or Power BI service refresh.
- Optionally set an Expiry date. It cannot be changed once the token is created. If your administrator has switched on automatic expiry, a date is applied for you when you leave the field empty.
- Select Create token.
Step 3: Copy the token #
The Your new access token dialog holds the value, hidden behind dots.
- Select Copy to put the token on your clipboard, or Show if you want to read it first.
- Paste it straight into Power BI, or keep it somewhere safe, such as a password manager.
- Select Close.
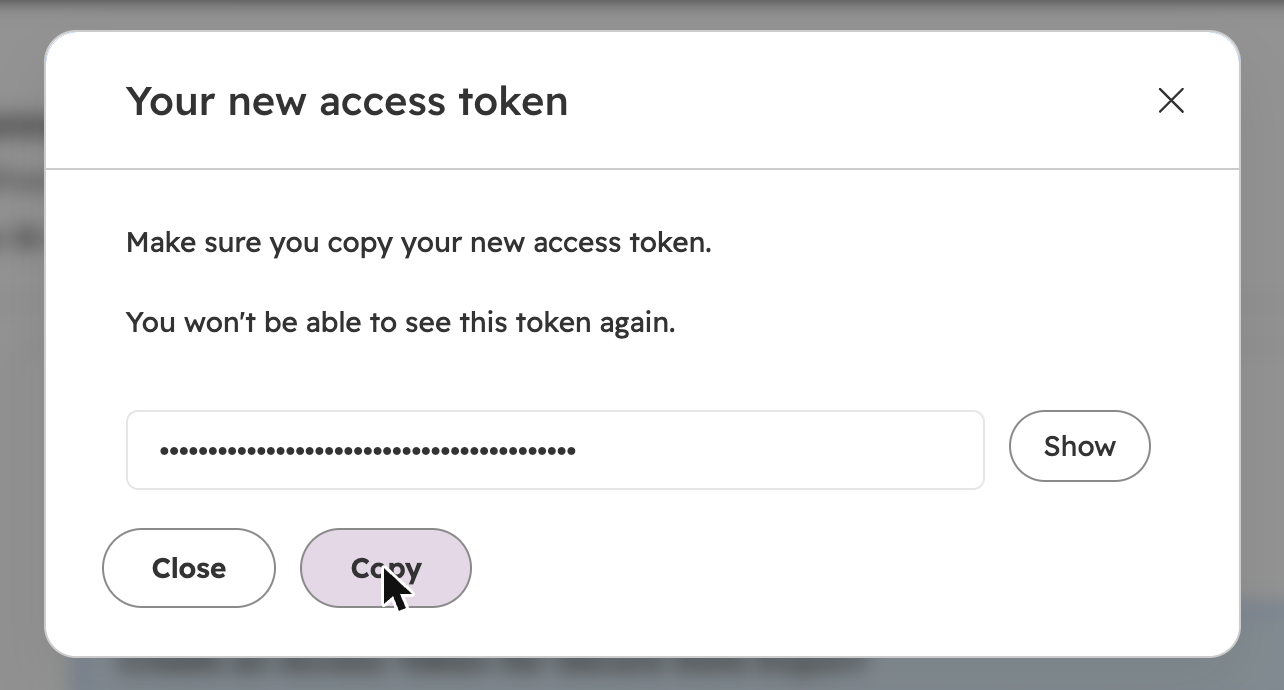
⚠ Copy the token before you close the dialog. The connector never shows it again. If you lose it, revoke that token and create a new one.
Step 4: Check the list #
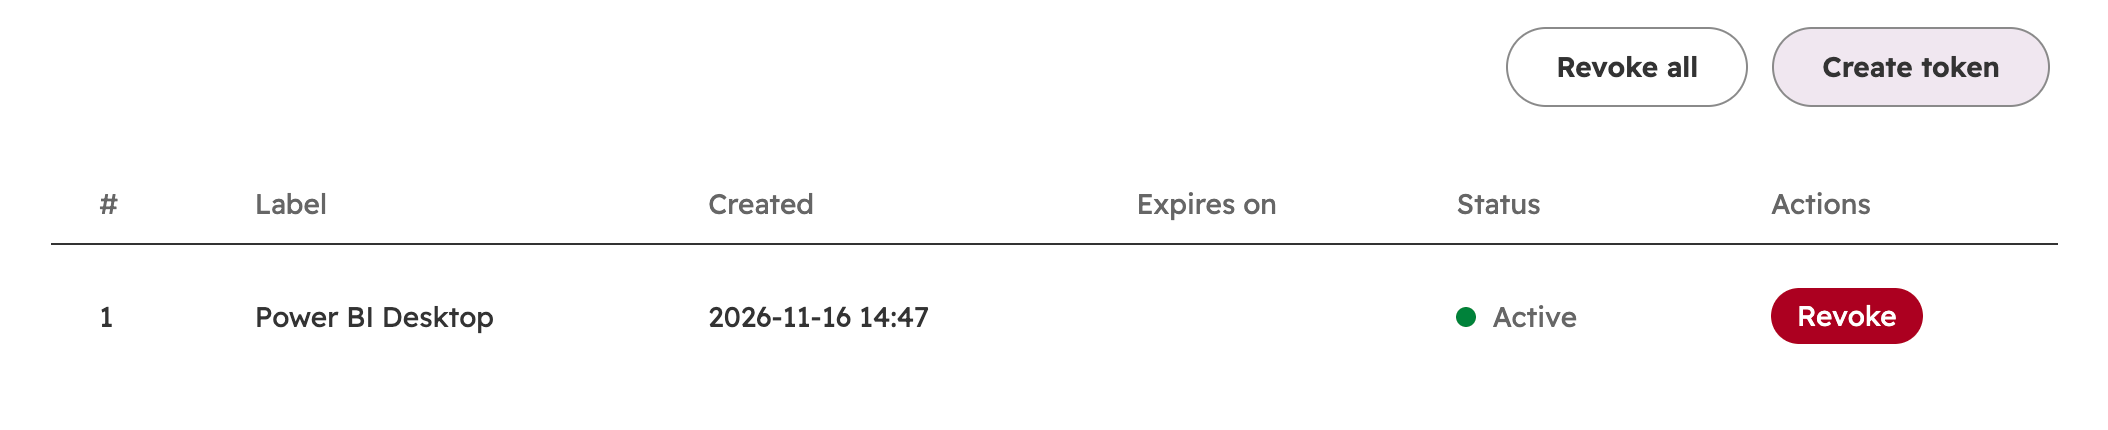
The new token is listed with its label, creation date, expiry date if it has one, and the status Active. Only active tokens can sign in.
Use the token in Power BI #
- Power BI Desktop: select Basic in the sign-in dialog and paste the token as the password, see Connect Power BI Desktop, Step 6.
- Power BI service: enter it under the semantic model’s Data source credentials, see Schedule Refresh in Power BI Service, Step 4.
Good practice #
- Create one token for each place you use it, for example one for your computer and one for the Power BI service, so you can revoke one without stopping the other.
- Treat a token like a password: do not put it in emails, chats or shared files.
- Set an expiry date for tokens you only need for a while.
Related: Manage Access Tokens for revoking tokens, Configure the Token Expiry Policy, What happens if I lose a token?


