A data source is the read-only bridge between your HubSpot portal and Power BI. It bundles a selection of HubSpot objects (Contacts, Companies, Deals, Tickets, custom objects, and more), the properties you want to expose, optional row filters, and the sharing list, into a single endpoint URL. Once saved, Power BI Desktop loads the data source like any other OData feed.
Creating a data source doesn’t move or copy data into the connector — the OData URL queries HubSpot live on every refresh.
Before you start #
- You’re signed in to the HubSpot account where Power BI Connector for HubSpot is installed. If you can’t see the connector in the apps grid, ask an administrator to grant you access.
- You know which HubSpot objects and properties your report needs. The selection is editable later, so it’s fine to start broad and trim down.
Open the form #
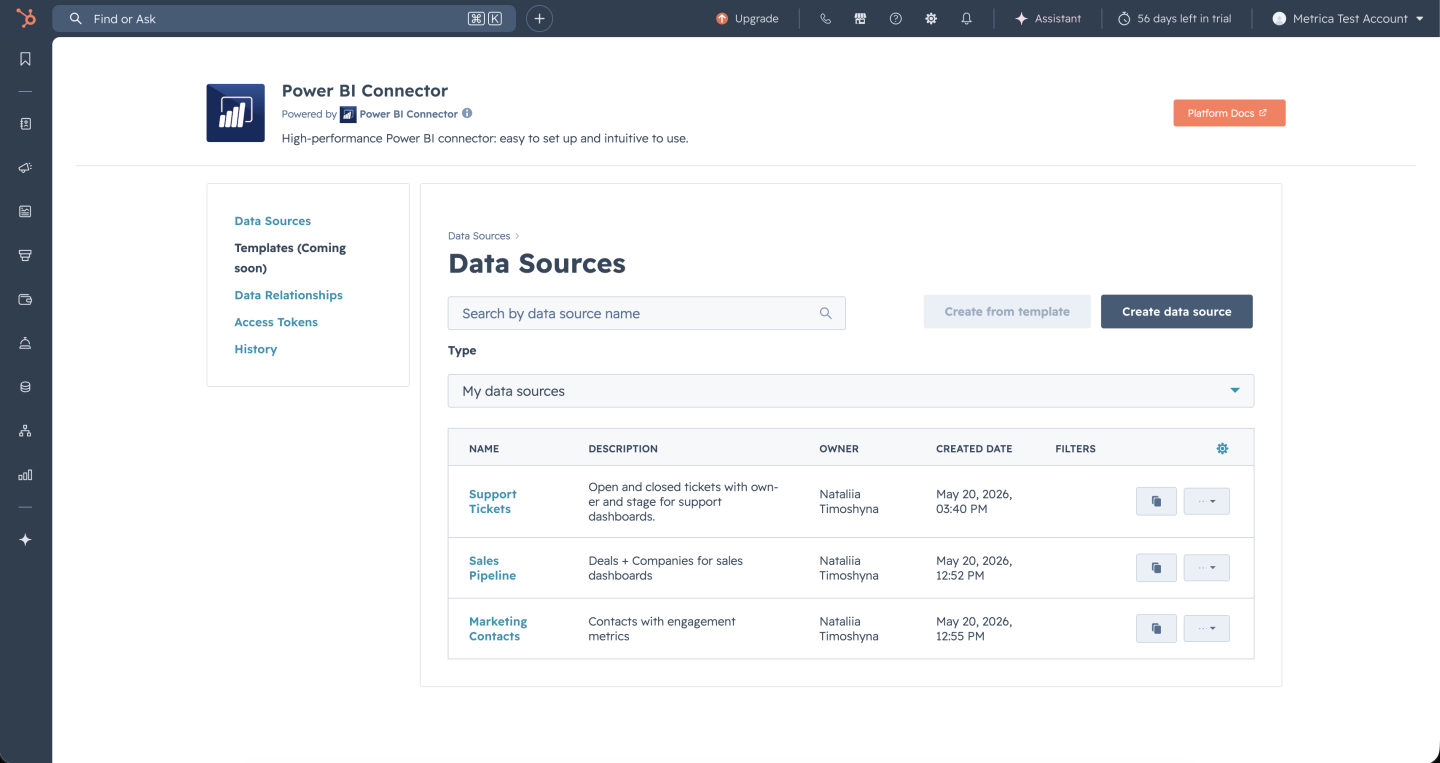
On the Data Sources page, select Create data source. The connector pre-loads the list of HubSpot objects available in your portal — expect this to take 10-20 seconds on first use as it enumerates all object types and properties.
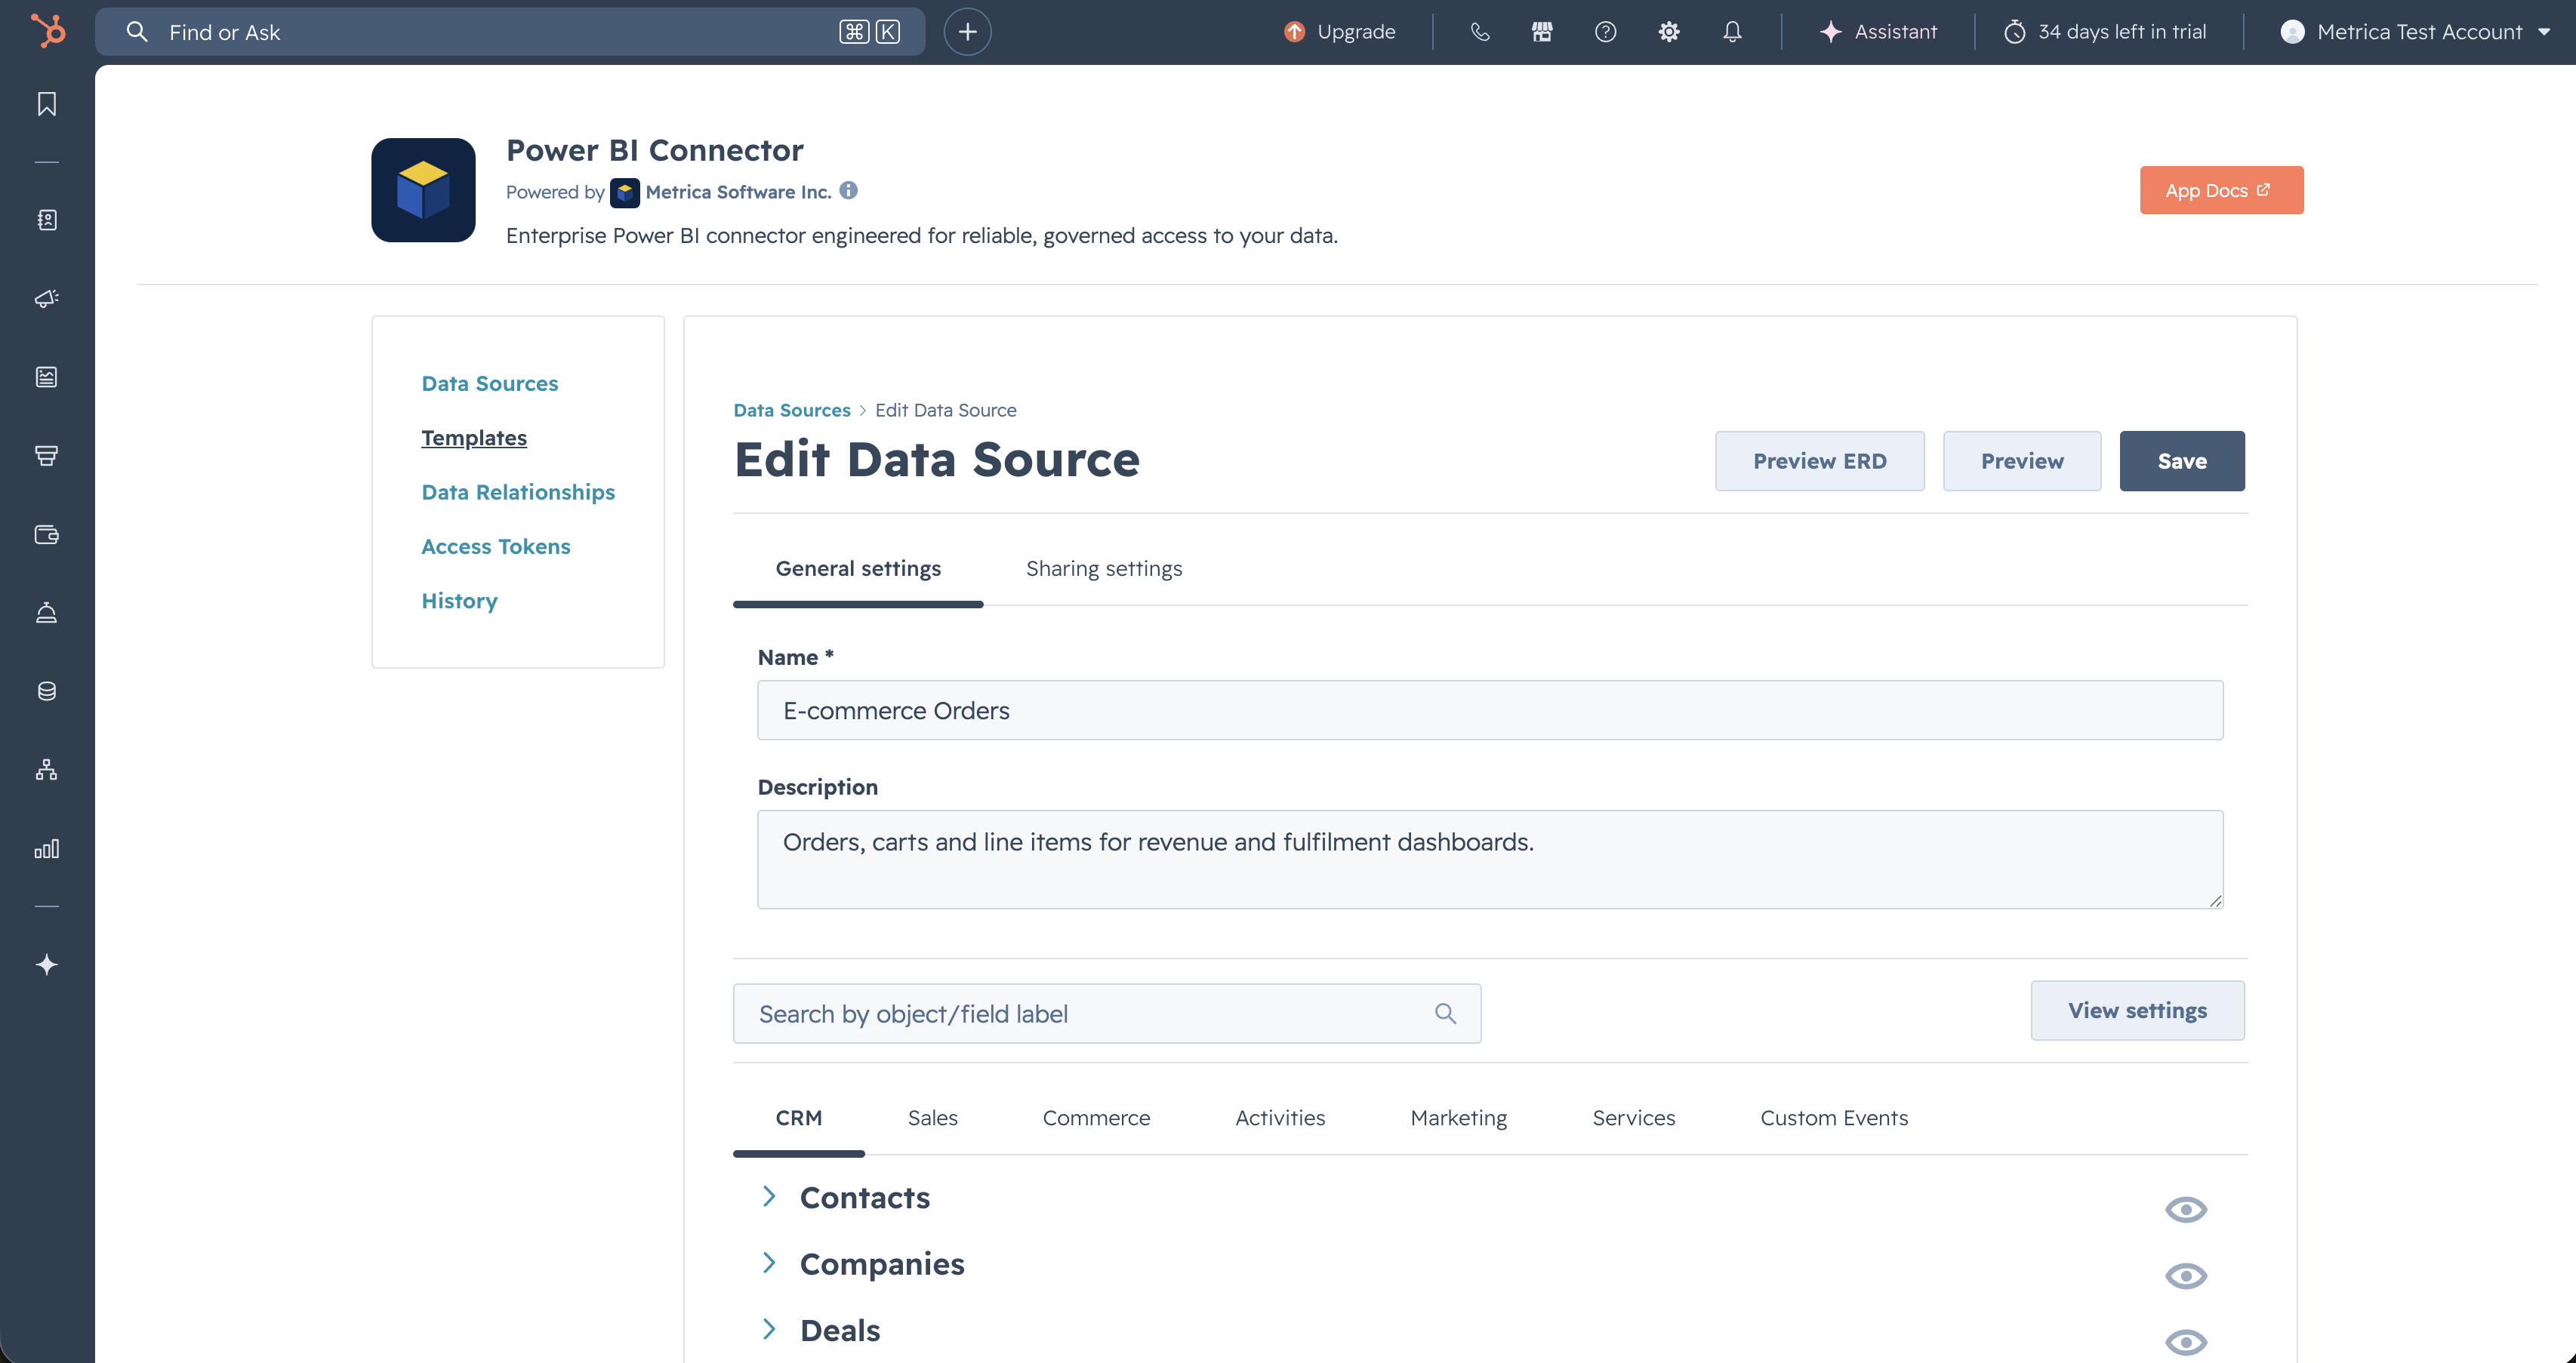
The form has two tabs: General settings (name, description, object + property selection, filters) and Sharing settings (Users and Teams).
General settings #
Name and description #
- Name (required) — short and memorable. It appears in the Data Sources list and in the OData URL hash.
- Description — optional. Useful for the reader — you, your team, anyone you share the data source with. Examples: “Deals + Companies for sales dashboards”, “Tickets with owner and stage for support reporting”.
Pick HubSpot objects and properties #
The connector groups HubSpot objects under six Hub tabs: CRM, Sales, Commerce, Activities, Marketing, and Services. Click a tab to switch hubs; click an object to expand its property checklist.
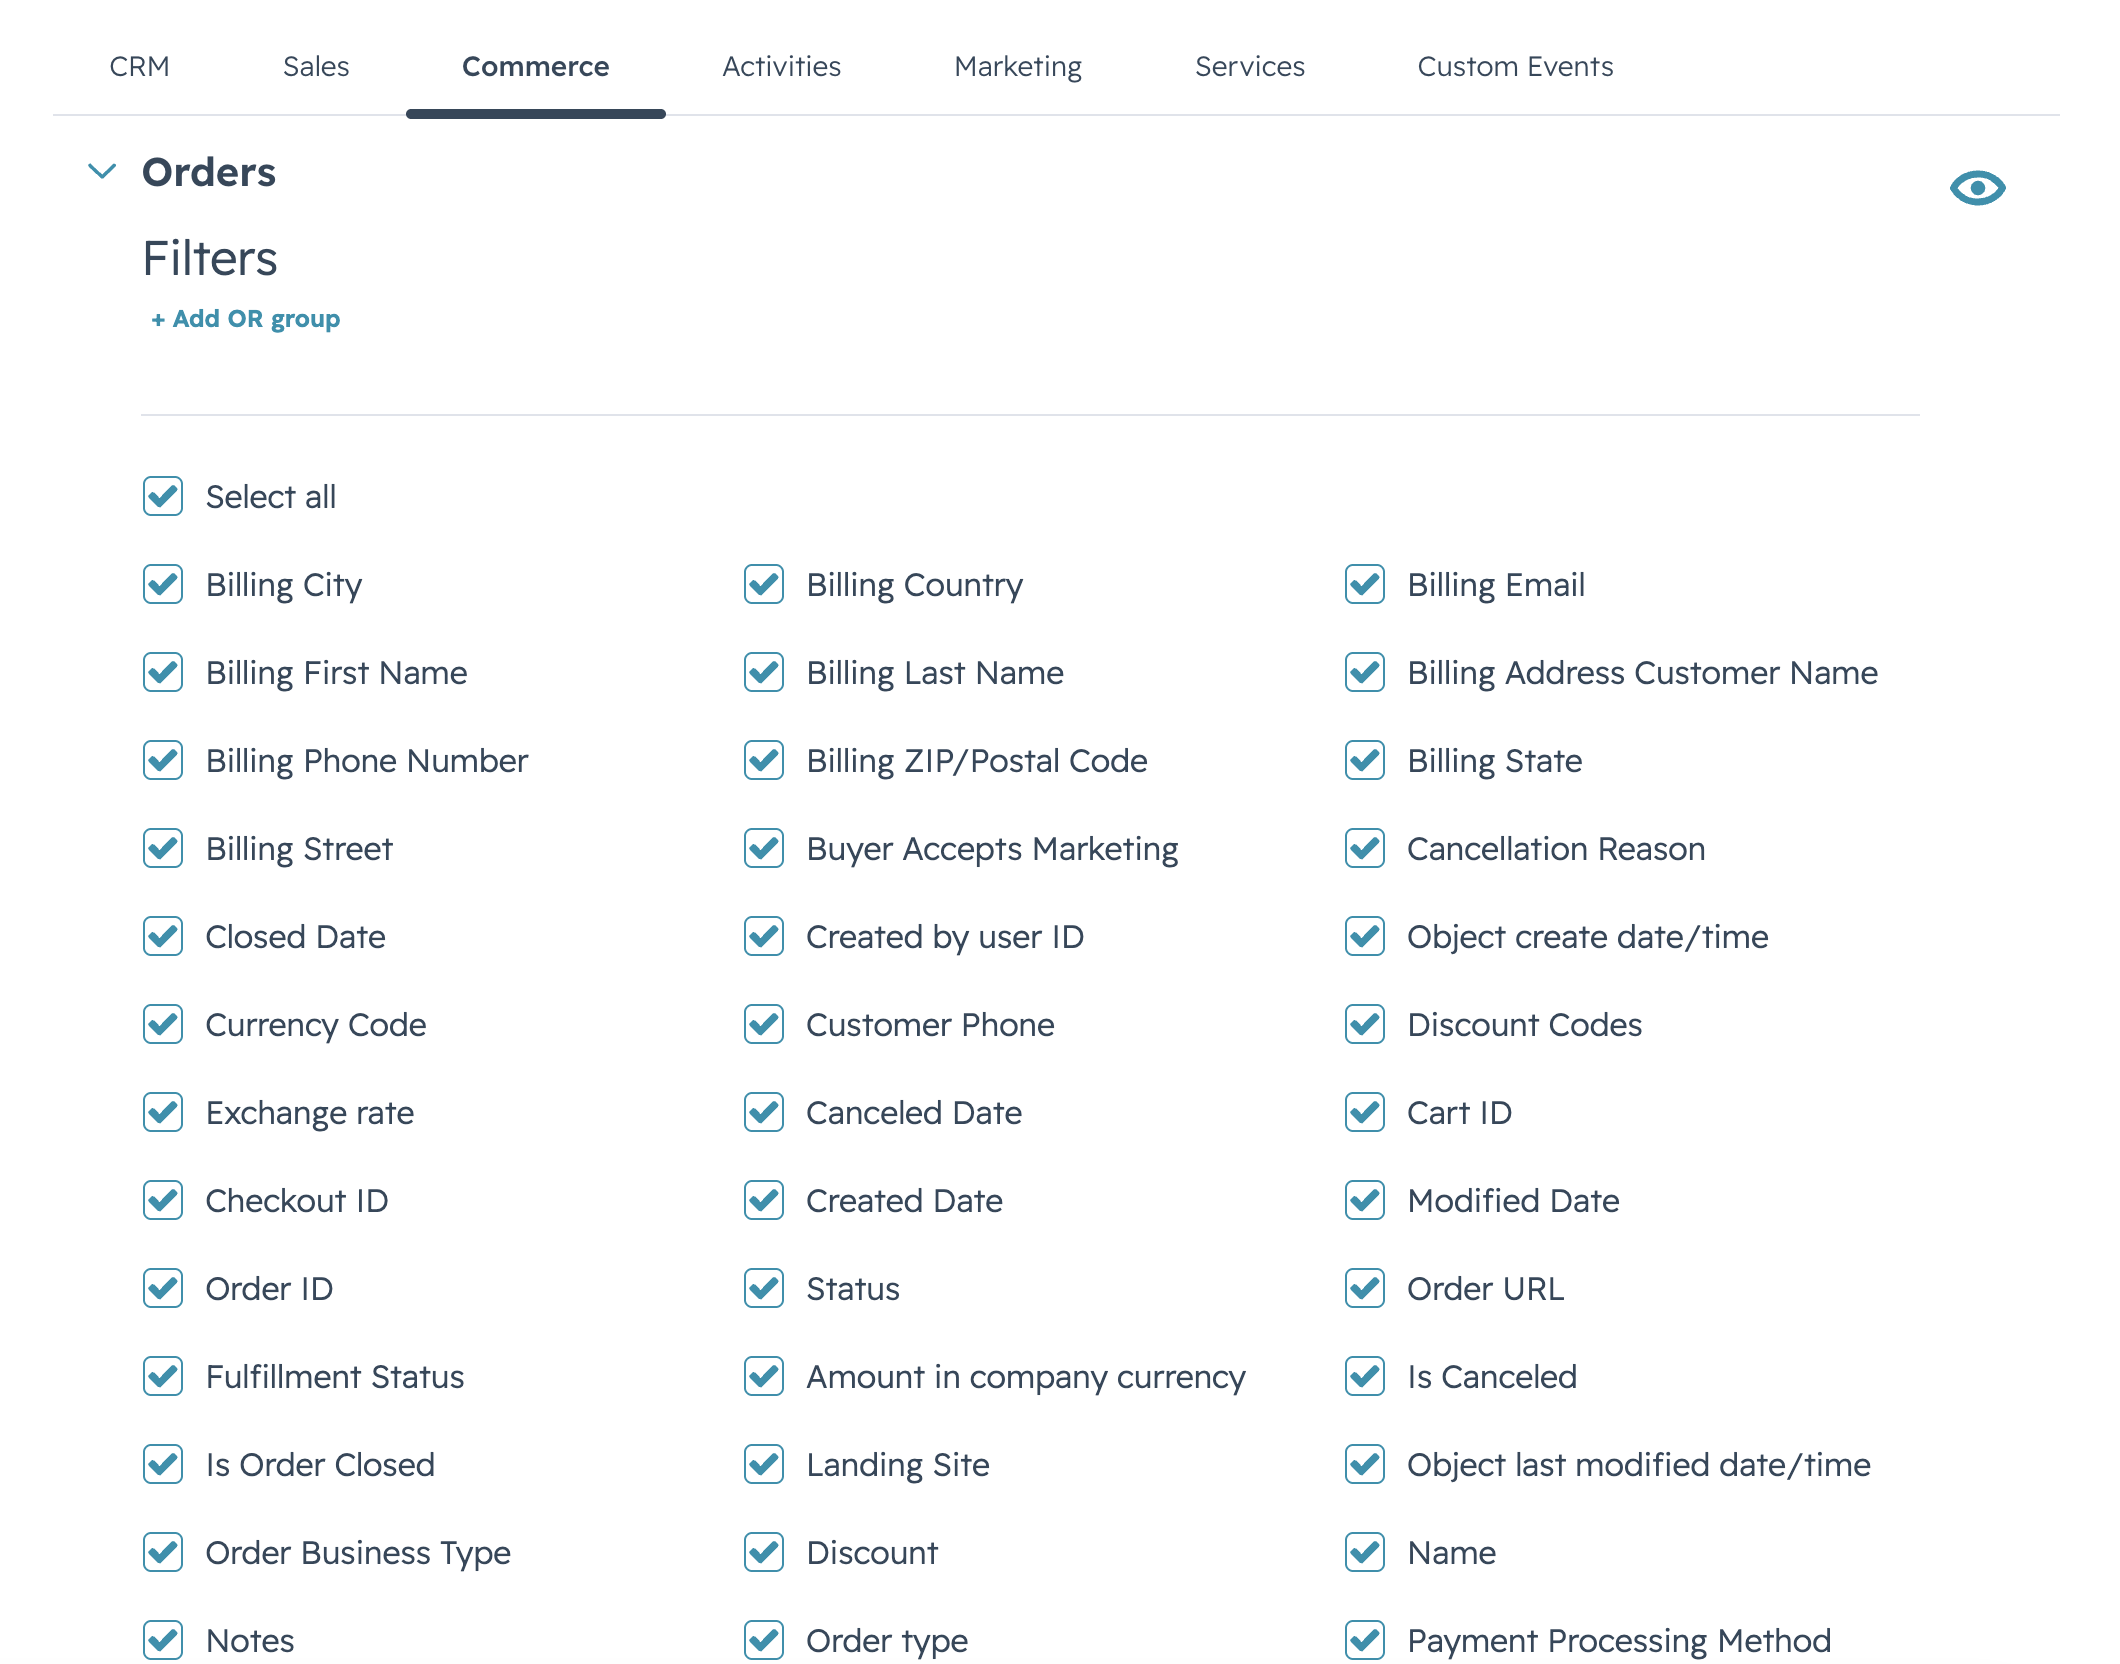
For each object you want in the data source:
- Expand the object by clicking its chevron.
- Tick Select all to include every property, or pick individual ones from the three-column checklist.
- Optionally add a row filter using the Filters section. See Filter rows for filter syntax and the + Add OR group control.
Search by object or field label #
The search box above the Hub tabs filters the entire object tree by label or HubSpot API name. Use it when you know the property you need (“close date”, “createdate”, “hubspot_owner_id”) but don’t remember which object it lives on.
View settings #
The View settings button (right side of the search row) opens a panel with display options for the object tree:

- Table visibility — expand or collapse every object at once. Useful when you’ve drilled into many objects and want to start over.
- Table sorting — Default shows objects in the connector’s canonical order; Selected first floats objects you’ve picked properties on to the top of the tree.
- Field details — Show API names appends each property’s HubSpot API name (for example,
close_datenext to “Close date”). Show types appends the OData EDM type, which is the type Power BI sees on import (Edm.DateTimeOffset,Edm.String, and so on).

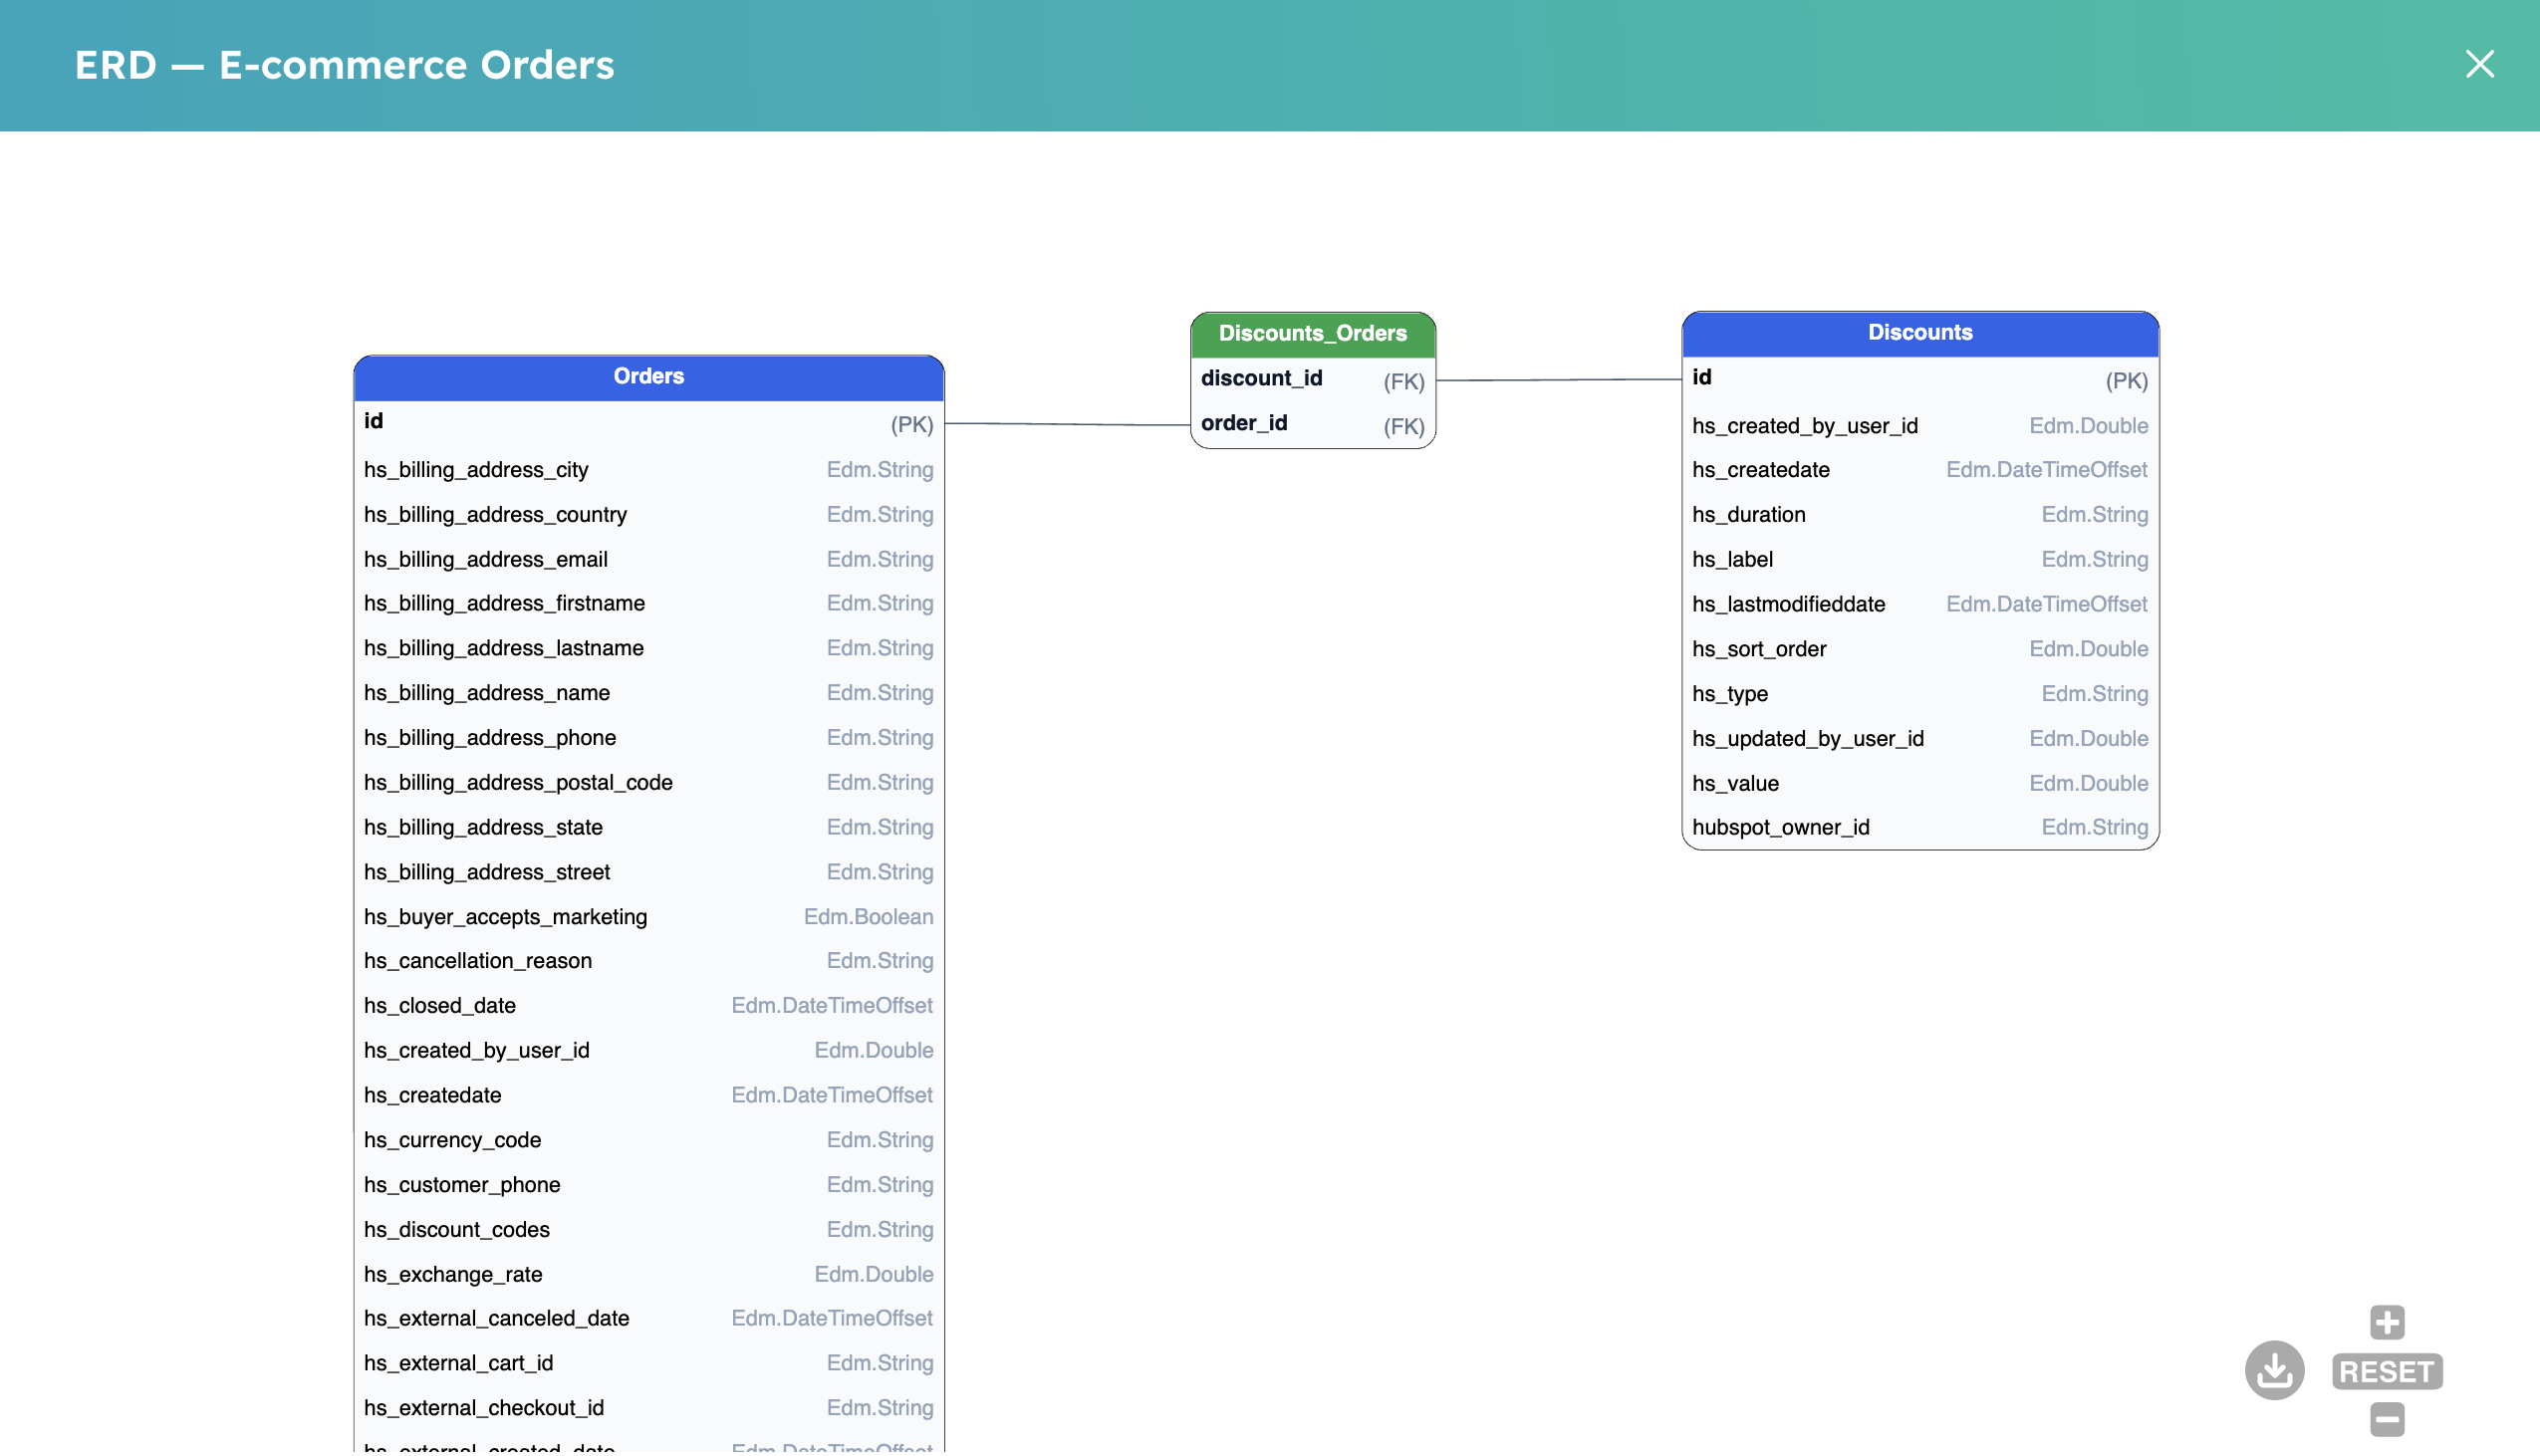
When you pick parent objects, the connector quietly adds junction tables alongside your selection — small bridge tables that protect your Power BI report against future cardinality changes in HubSpot. They appear green on the ERD. If a HubSpot admin later flips a 1:1 or 1:N association to many-to-many, your existing reports keep refreshing because they already go through the junction. You don’t need to select these yourself. See Junction tables for the rationale.
Sharing settings #
The Sharing settings tab controls who else in your HubSpot portal can use this data source.
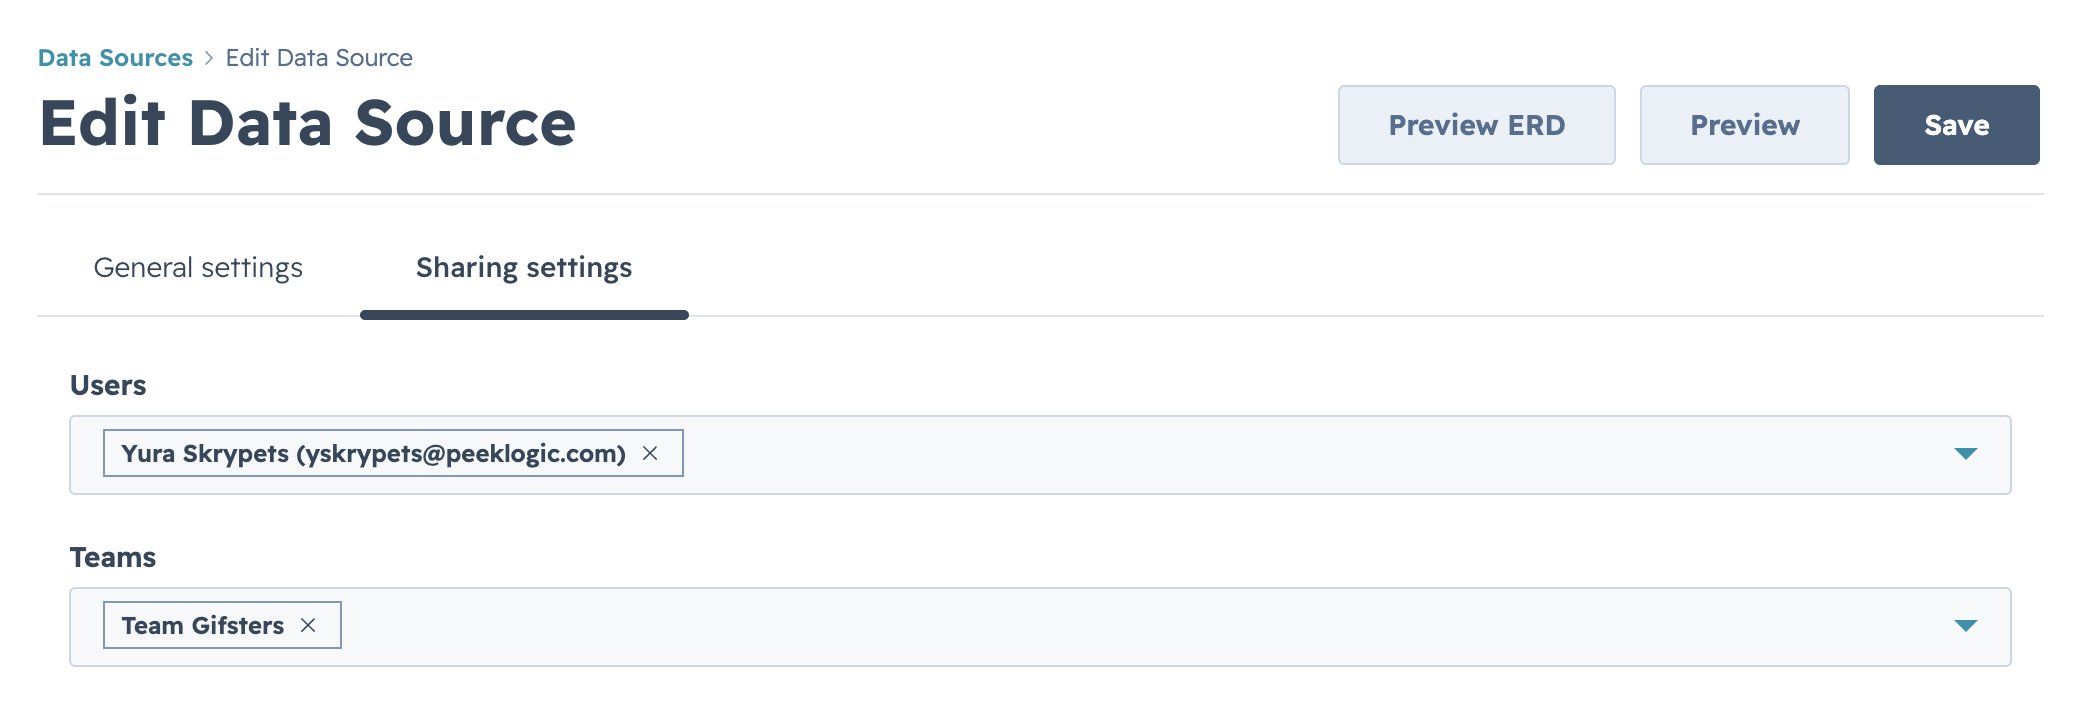
- Users — pick individual HubSpot users by name or email. Each user you add can preview the data, copy the OData URL, and refresh it in their own Power BI Desktop with their own access token.
- Teams — pick HubSpot teams. Everyone on a team gets read access automatically, including users added to the team later.
Shared users get read-only access — they can use the OData URL and preview the data, but they can’t change the selection, filters, or sharing list. See See what’s been shared with you for the recipient’s view.
Admins automatically have access to every data source in the HubSpot portal — not only those that are explicitly shared with them. They can view, edit, transfer ownership, or delete any data source. This is intentional: if the owner of a data source leaves the team or changes roles, an admin can take over without a manual handoff.
Preview before you save #
The action bar at the top of the form has three buttons: Preview ERD, Preview, and Save. All three stay disabled until the form is valid (a name and at least one property selected).
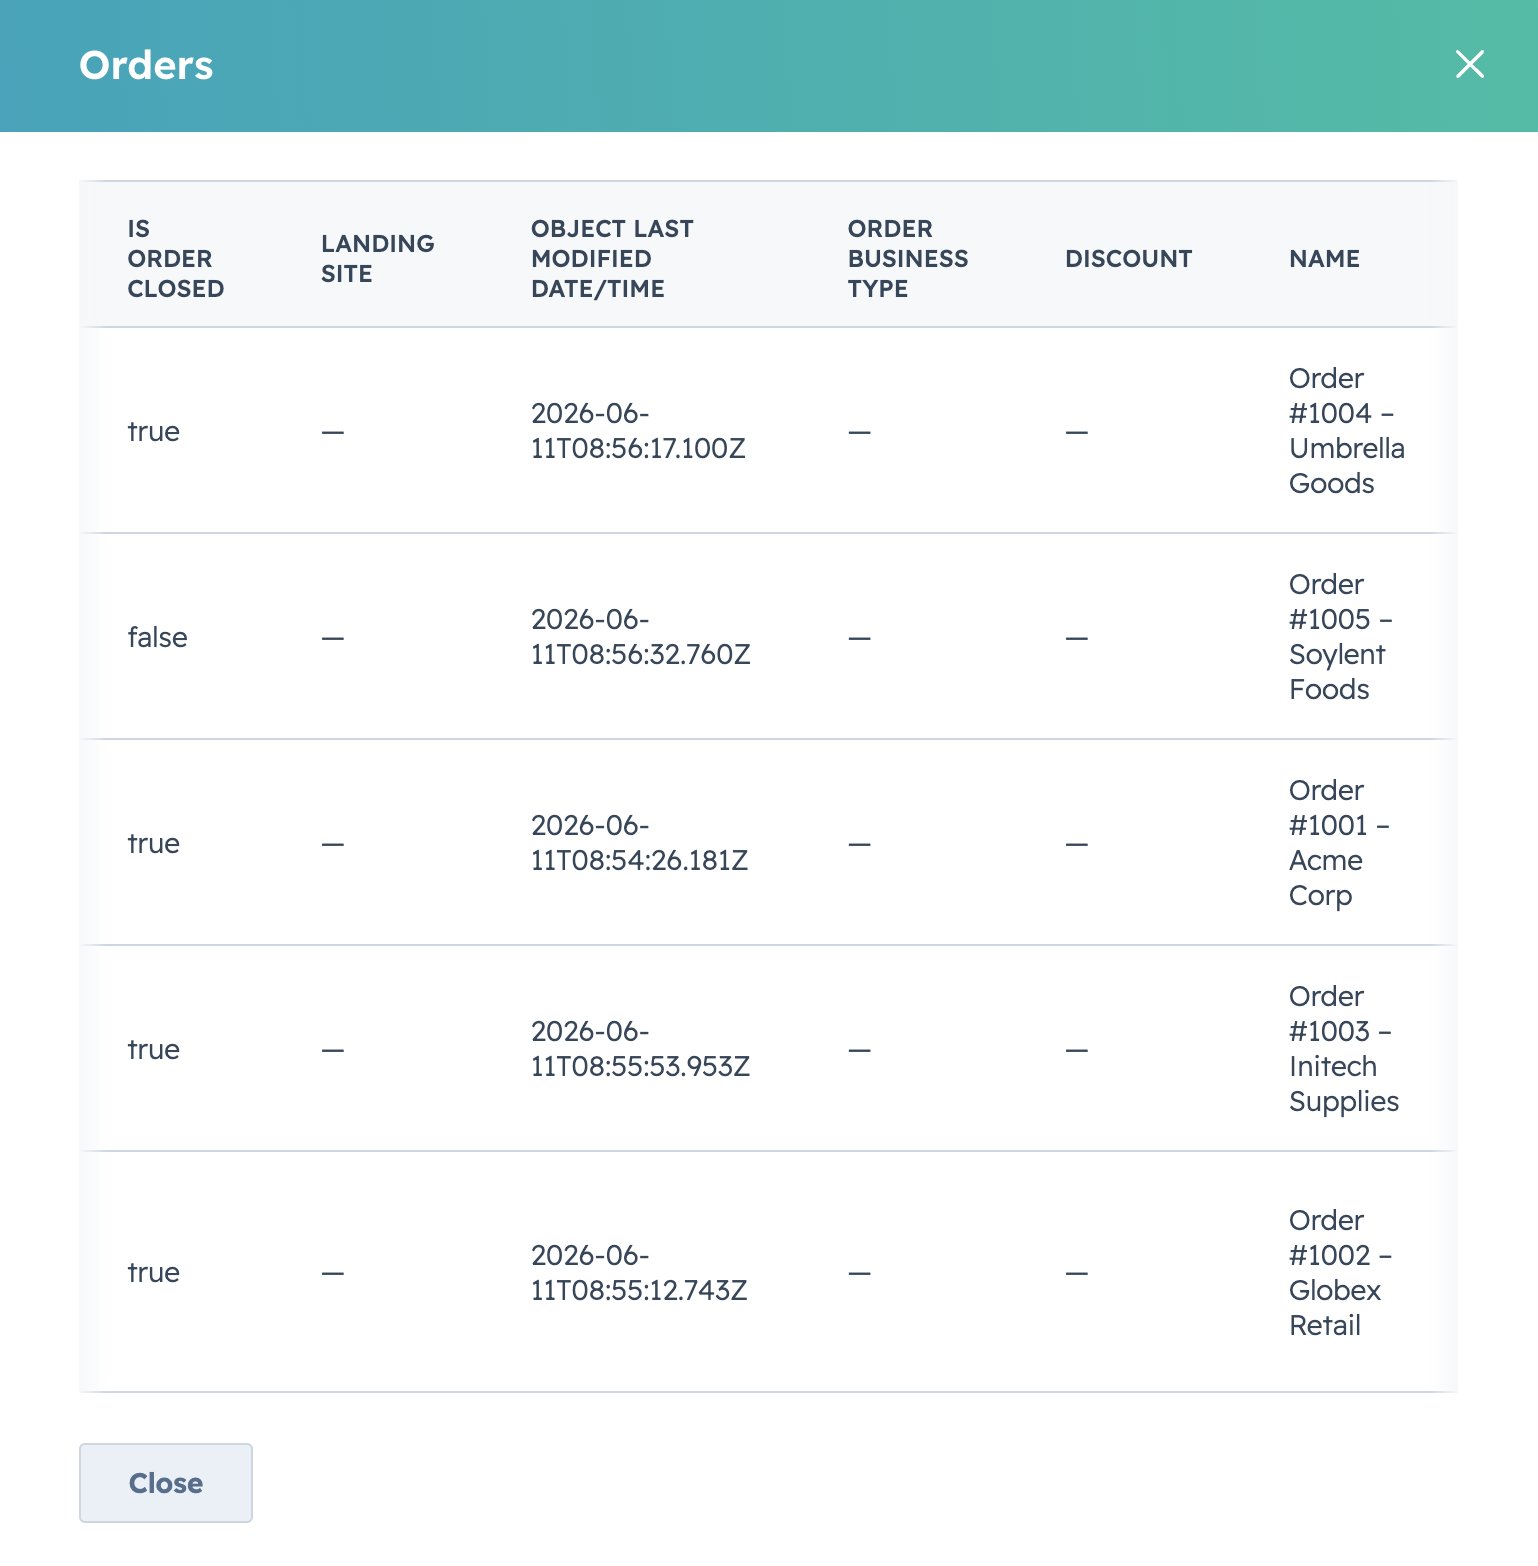
Per-object preview #
Inside the expanded panel for an object, the eye icon next to the object name opens a live preview of the first rows that object will return, including any filters you’ve applied.
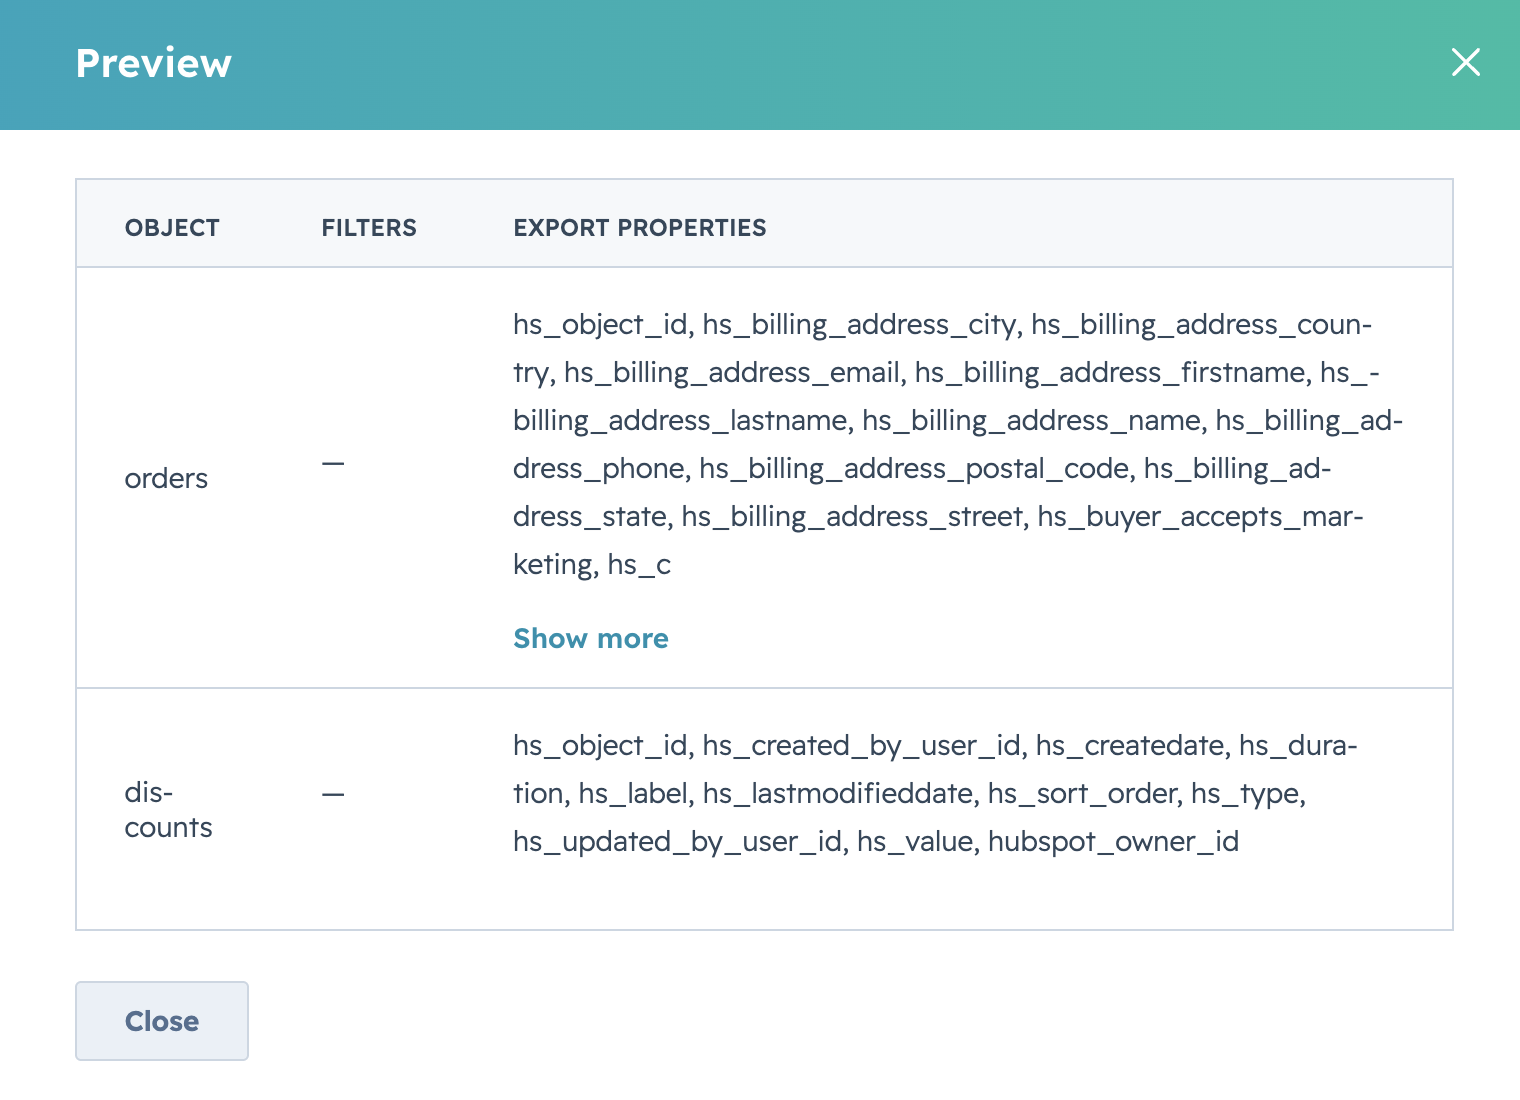
Selection preview #
The Preview button in the action bar opens a summary table listing every object, every selected property, and any filter expression in the current selection. It’s the quickest sanity check before saving.
Preview ERD #
The Preview ERD button opens the ERD between selected HubSpot objects — Contact ↔ Company ↔ Deal ↔ Ticket and any custom object associations you’ve enabled. See Preview the ERD for details on how the connector flattens HubSpot’s many-to-many associations into Power BI tables.
Save #
Click Save (top right of the form) when you’re happy with the selection. The data source appears in your Data Sources list with a unique OData URL ready for Power BI.
From here, you can:
- Copy the OData URL and load it from Power BI Desktop.
- Edit the data source later — everything except the URL is editable.
- Share it with more users or teams.
- Clone it as a starting point for a similar selection.


